Showing posts with label Firewall Forward. Show all posts

Saturday, August 7, 2021

Turbo Coolant Troubleshooting (4)

 4 hours

I needed to revisit the turbo cooling system because the last time I tried to fill it, there was almost no flow from the pump and I couldn't really figure out what the problem was.

Sonex put out a message saying that the thermostat could protrude too far into the "T" fitting on the front of the turbo, which could block some of the coolant flow.  Seemed reasonable to me, so I ordered a new T fitting and a bushing to move the thermostat up from the T somewhat.


Here's the old setup:


I removed the original T fitting, but I found that the thermostat didn't protrude into it at all anyway.


As far as I could tell nothing was blocking any flow at the turbo either.


I installed the new parts anyway since I had them, and at least now the thermostat is a lot easier to access if I ever have to replace it.


I don't think there was any blockage, so the problem must be trapped air in the system somewhere, probably the radiator.  I decided what I needed to do was try filling the coolant again and force the air out somehow.  I went and got a little hand pump for transferring fluid, and I tried disconnecting one of the lines at the radiator and forcibly pumping coolant through, and that forced a lot of air out.  However, I had no real good way to disconnect the pump and reconnect the lines without air getting sucked right back in.

Finally what I ended up doing was just adding a little T at the radiator outlet, to act as a bleed port.  Then I was finally able to fill the system, and the air was able to travel out of the radiator and escape out the top of the T.  When it was full I just clamped a cap on the T.  I had to reroute one of the lines from the T around the right side of the engine mount to get to the coolant pump, but that was it.  I can't really tell for sure if it's finally working properly or not now, so we'll have to see how it cools the turbo once the engine is running!


Saturday, June 5, 2021

Firewall Hardware (2.5)

 2.5 hours

Nothing too exciting here but I wanted to go back over the firewall and replace all the nylon (AN365) lock nuts with either all metal (AN363) nuts or nut plates.  I put nut plates on a handful of things I thought I could reasonably expect to ever to need to remove and replace, such as the ignition coils, voltage regulator (to adjust, hopefully not replace), and the coolant pump for the turbo.


Tuesday, May 18, 2021

Fuel Supply Line Changes (2)

 2 hours

I'm back!  Another deployment is in the books and now I'm trying to remember where I left off.  Besides finishing everything that still needs to be done to complete the plane, I have generated a few extra projects while I was gone too.

First one to tackle is the fuel supply line.  After doing some research I realized I should add a fuel filter, so I re-did the line from the tank to the firewall.  I also took the opportunity to move the fuel flow sensor closer to the tank in hopes of making it as accurate as possible, and adjusting the position of the shutoff valve to make it easier to reach from the seat.

The fuel filter is from Jegs (link), and it was the most compact serviceable filter I could find.  I had to shorten my "flexible" line by about an inch with this new setup, so it's not really that flexible anymore, but it's just flexible enough to connect to the firewall bulkhead fitting, so it's good enough I guess.

Here's what the supply line looks like now:


Wednesday, December 2, 2020

Fuel/Oil Lines (5)

5 hours

I still had a couple of lines left to do, starting with the fuel supply line.  The plans call for hard lines here, but after reading about the possibility of the lines getting bent and cracking open in an accident, I decided to just use the leftover flexible line I had from the engine instead.  Here's the line from the firewall to the AeroInjector; I later went back and added a fire sleeve over this line.


The line from the shutoff valve to the firewall is pretty much the same:


Next, I installed the Peter Anson check valve in the fuel vent fitting.  It took some finagling, but I got the existing line to connect to a new 90-degree fitting installed on top of this fitting.  It just barely fit under the windshield!!


Finally, I did this oil line from the pump to the engine case.  I originally thought it would be handy to put a bulkhead fitting on the baffle and make two separate lines, but I found that there wasn't enough space to bend the line properly to connect the bulkhead fitting to the fitting on the front of the engine.  This was the best I could do, but I found that the line sticks up too high and hits the cowl!


I re-did it as a single line passing through a grommet in the baffle, and that worked a lot better.  I also put a fire sleeve over the lower part since it's pretty close to the exhaust.

Saturday, November 21, 2020

Baffle/Cowl Sealing (6)

 6 hours

I had mostly put the baffles together quite a while ago but I never really finished sealing it against the cowl.  Today I fit the rest of the rubber seals!  I found that the gap between the aft fence and the cowl was too large for the supplied seal (mostly because I cut more off of the baffle than I needed to), so I used a 3" rubber strip for that area.  The seal that came with the baffle kit seemed to work well for the front and sides though.


Wednesday, August 5, 2020

Mounting Firewall Stuff (10)

10 hours

This entry covers several little sessions of figuring out where to put everything, getting the correct hardware, and mounting everything to the firewall!

Initially it seemed to me there'd be plenty of room for everything, but it actually filled up pretty quickly.  I had to be careful to lay things out in an efficient way for wiring, and I also had to watch out for things on the forward and aft side interfering with each other (I couldn't put a bolt for something on the aft side through a space where I had already mounted something on the front side).

Here's a list of everything on the firewall.

On the forward side (roughly from aircraft left to right):
Throttle Cable
Mixture Cable
Firewall Penetration (for wires)
Start Button Relay
Battery
Filter Capacitor
Alternator Control Relay
Voltage Regulator
Ammeter Shunt
Master Contactor
2x Ignition Coils
Fuel Bulkhead Fitting
Turbo Cooler Water Pump
Oil Filter

On the aft side:
Cables & Wire Penetration
Fuel Level Probe Transducer Box
Garmin GEA 24 (engine/sensor interface)
Ground Block
TCW IPS-12-4a (power stabilizer)
3x Fuse Blocks

It was fairly tedious to mount all this stuff, mostly because I had to go hunt down all the hardware and wait for it to show up, and also because I couldn't access the front of the firewall to drill holes in a lot of the locations, so I had to drill them from the outside.  Despite that though, I don't regret figuring this all out after the engine is installed, because it made it easy to avoid large engine parts that would have potentially interfered with other parts (like the turbo and exhaust).

It's hard to show everything in photos, but here are a few:


Here are some poorly drawn sketches that might also be handy for reference:


Sunday, July 26, 2020

AeroInjector and Throttle/Mixture Cables (3)

3 hours

I wanted to get the throttle and mixture cables figured out, since they have to penetrate the firewall and they aren't super flexible, so I didn't want to inadvertently install something that would be in their way.

The first thing was to source parts.  After some research I ended up ordering this mixture control from Aircraft Spruce:  https://www.aircraftspruce.com/catalog/appages/a7902.php

It's probably overkill for this plane, but I wanted a vernier knob and this one seems pretty nice.  I ordered the 72" length, and only ended up cutting off like a foot, so I recommend that length.

For firewall penetrations, I bought two of these cable fittings:  https://www.aircraftspruce.com/catalog/appages/cablesafe.php

They have a 1/4" ID, which fit the ACS mixture cable perfectly.  The stock AeroConversions throttle cable is a hair larger than 1/4" though.  I carefully drilled one of the fittings a tiny bit larger to fit the throttle cable, and it seems to have worked fine.


I installed the mixture control in the stock location on the left panel support bracket.  I updrilled the pre-drilled hole to the appropriate size and then installed the control housing.  The only issue with this stock location is that the bracket is a little small for this knob.  I ended up having to omit the lockwasher that came with it, and file a little bit of a chamfer on one edge of the nut so it would fit.  It might have been worth trying to drill a new hole in a different place, but I think this will work.

I located my two firewall penetrations in the upper left corner of the firewall, to give both cables as straight of a shot as possible through the fittings.


The next step was to install the throttle cable into the AeroInjector.  You have to disassemble it to install the cable, and then it just snaps in to the throttle plate.  Then I put everything back together and fed the cable back through its housing to the throttle lever.


To make a nice angle for the two cables, I installed the injector on a slight angle to the cables enter it from the front right.

Next I connected the mixture cable.  This gave me some trouble at first, because the instructions have you route the cable end through a swivel nut and then tighten the nut.  It's supposed to be tight enough to hold the cable tightly, and still allow the swivel nut to rotate within the swivel arm.  I found that tightening it at all clamped the cable against the arm, so it couldn't rotate!

I ended up buying a set screw from Home Depot, running a tap through the swivel nut so the whole length was threaded, and then installing the set screw from the opposite side.  The set screw pushed the cable away from the arm, so when I tightened the original screw it held the cable securely without locking it against the arm.  That worked well and now it moves nice and freely!


Here's my overall cable routing:


Sunday, July 19, 2020

Oil Separator and More Coolant Lines (3)

3 hours

Continuing on with getting the major things mounted on the firewall, next I mounted the oil separator just outboard of the radiator on the engine mount.  I used two adel clamps on top and one at the bottom.  I'm still waiting for a couple of parts before I can make the oil return hose that'll run from the bottom of this can to the oil sump on the engine, so I'll do that later.


I also ran the long coolant line from the radiator outlet to the pump inlet.  I ran it down the firewall and ziptied it to the intake tube and then the engine mount right in front of the pump.  Again, I think I will replace these zipties with something more durable before I call it done.  This used up all that was left of the hose that came with the radiator, so I'll just need to buy a little more to connect the coolant bottle to the radiator inlet.


Turbo Cooler Radiator (8)

8 hours

The next large items I needed to find space for near the firewall was the radiator and coolant bottle for the turbo cooling system.  Sonex provides a plan for cutting out and bending a little radiator plenum, which I found to actually fit pretty much perfectly.  I made it out of a chunk of scrap sheet I had from ages ago.


Next I had to figure out where and how to mount it.  There are some pictures at the bottom of the page here that I used for reference: https://www.sonexaircraft.com/aeroveeturbo_update_020618/

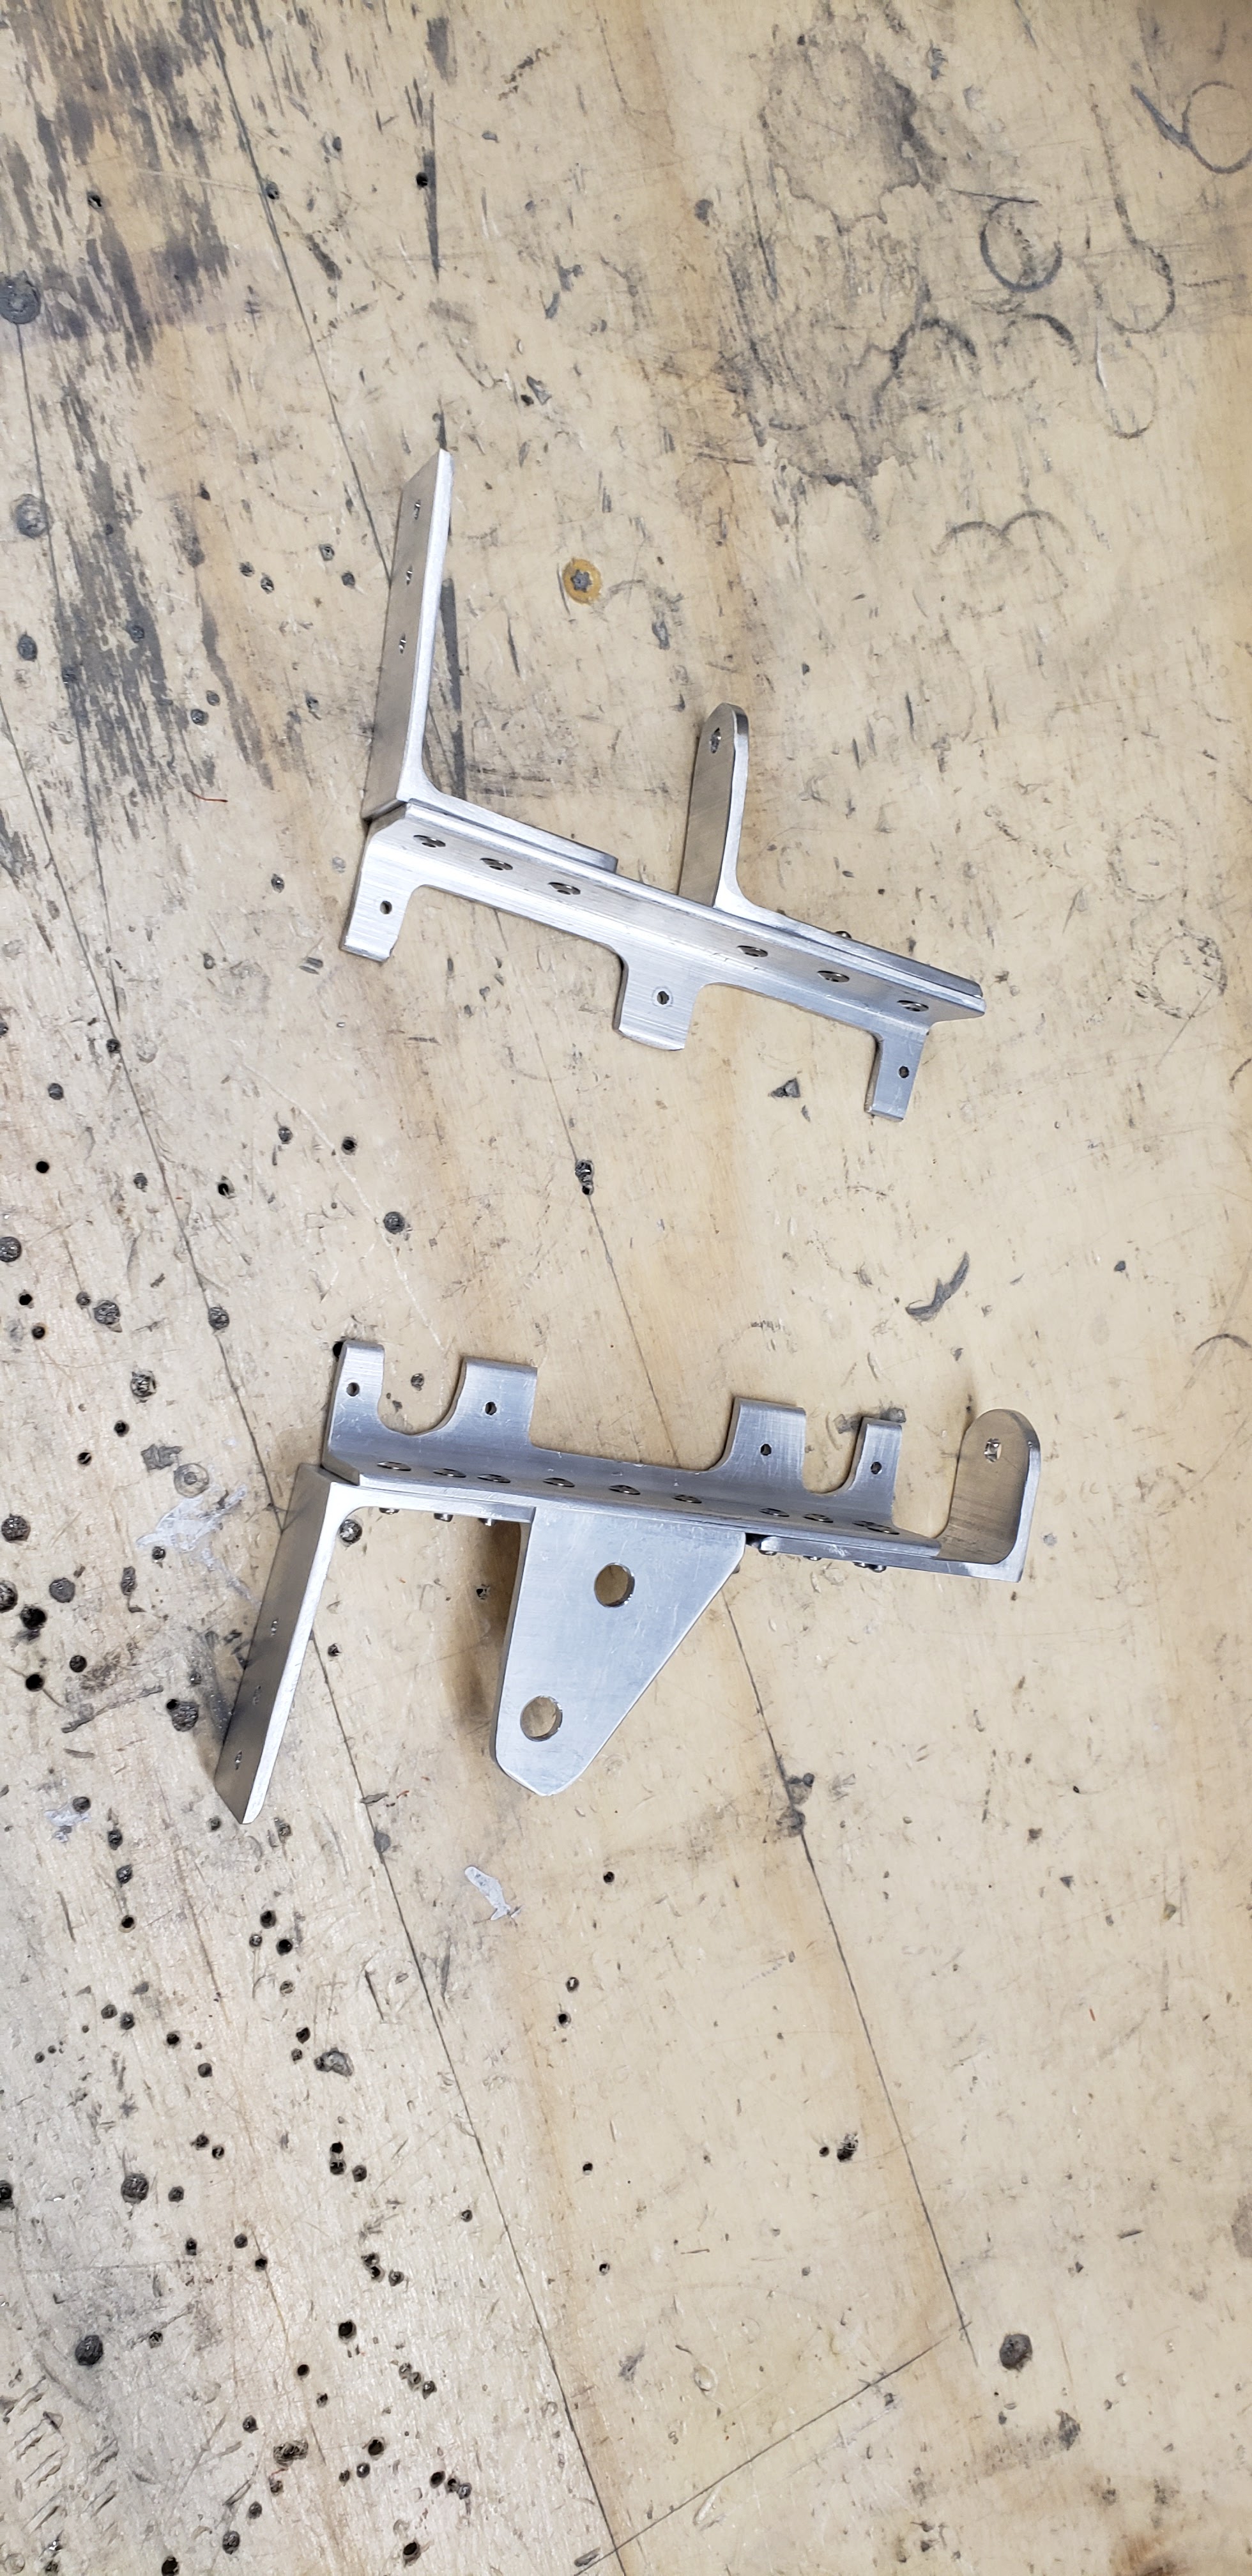
I ended up for the most part copying what Sonex did.  I made a piece for each end of the radiator out of 1"x1" angle, and then some small brackets out of 2"x2" angle, cut into various shapes and sizes.  The brackets on the aft side will be riveted to the firewall, and the brackets on the forward side will be attached to the engine mount with adel clamps.  I also used another piece of 2" angle to create a mounting point for the coolant bottle.  It took quite a bit of trial and error to get the geometry of each bracket figured out, but eventually I think I came to a good solution.


I put the bottle at a slight angle to help it fit between the intake side of the turbo and the cowl.


I riveted the brackets from the inside to avoid possibly interfering with the gas tank.


The manifold pressure transducer was going to interfere with one of the coolant lines to the radiator, so I installed a 90-degree street elbow to get it out of the way.


The run from the turbo coolant outlet to the bottle inlet is really short so I had to bend the hose barb on the bottle out slightly to make it fit without kinking the hose.