Showing posts with label General. Show all posts

Sunday, January 16, 2022

High Speed Taxi Disaster

Don't do this!!!

Before I took to the air, I wanted to try and verify the engine was behaving well, and I thought I could learn more on a high speed ground run than I could doing static tests.  Well, it was a bit too windy to spend an extended amount of time on the runway at medium speed, and I ended up catching a gust of wind that was way stronger than whatever rudder authority and tailwheel traction that I had, and it pushed me right off the side of the runway into the grass.  Tragically this was also in the same place as the only taxiway sign within a couple thousand feet, and I collected that sign with the left wing leading edge.

I inspected the whole plane according to instructions from Sonex, and found no damage beyond the left wing.  Unfortunately the main spar received a dent as well, which means this whole wing is compromised.

Luckily my insurance just went into effect, so I'm going to do an insurance claim and buy a quick-build left wing box from Sonex, re-rig it, transplant the control surfaces, lights, and wiring, and then I think I can have it fixed.  Still, this is definitely going to take a while and set me back a few months!


Saturday, January 8, 2022

Airworthiness!

I got my airworthiness certificate!  I did all the paperwork following the EAA guide, and it all went smoothly.  No issues with the DAR, he pretty much liked everything that he saw.  The only recommendations he gave me was to think about adding some doublers where I mounted avionics items directly to the skins, and eventually add a fuel drain so I can check for water in the fuel.  For now though we're good to go!


Saturday, November 20, 2021

Weight & Balance (2.5)

 2.5 hours

***NOTE!  I later found that all the weights I measured here were totally wrong, when I re-weighed the plane in June 2022.  But this is still a good overview of the process at least.***

I've been waiting to get this done for quite a while; it's one of the last "admin" items I needed to do in order to get the plane inspected, and I was also very curious to find out what my plane weighs!

Once the prop was installed, the next task was to measure the plane.  I propped up the tail to put it in a level flight attitude, and then got to work.  The datum, as far as W&B is concerned, is the tip of the spinner.  I taped a plumb bob to it and marked a spot on the floor directly below.  Then I marked the following points, on each side of the plane: the wing leading edge, main gear axles, wing trailing edge, and the tailwheel axle.

For each pair of points, I connected my marks with a laser level so I could mark where along the centerline that fuselage station was.  Since I had marked the spinner tip and the tailwheel, I had two good points to also connect with the laser, so I knew where the centerline was.


Finally, I measured from my spinner tip (datum) mark, along the centerline, to each of the other points.


Here are the measurements I came up with:

Leading Edge: 52.2"
Main Gear: 55.1"
Trailing Edge: 106.2" (so the wing chord was 54.0" which matches the plans)
Tailwheel: 217.1"

Next was to weigh the plane.  I was not able to get my hands on any kind of official certified aircraft scales anywhere, so I bought three scales on Amazon instead.  They have a capacity of 440 lbs each, and as far as I can tell they're accurate.  My wife and I each weighed ourselves on a calibrated scale, and then both stood together  on each of these scales to see if our combined weight showed up correctly.  It was within 1.5 lbs on each scale, and our combined weight is about 290 lbs, which is pretty close to the weight on each main gear tire.  So based on all that I'm confident that these scales were good to go for this task!

Anyway, long story short here are the results (with the tail raised so the plane was level):

Left Main Gear: 291 lbs
Right Main Gear: 308 lbs
Tailwheel: 38 lbs
Total: 637 lbs

I'm pretty happy with that total weight!

Next came the W&B report.  Here's what I wrote up to submit with my airworthiness paperwork:


Friday, September 24, 2021

Fuel Flow Test (2)

 2 hours

One of the tests I still needed to do was to make sure the gravity fed fuel system would be able to supply enough fuel to run the engine at max power.  The guidelines I read stated that you should ensure the fuel system can supply 150% of the fuel required for max power, so for my 100 hp engine that would be roughly 15 gallons per hour.  It also said that a nose-up attitude is typically the worst case for fuel flow, since the carburetor is higher and the outlet from the tank is lower.

Anyway, I raised the nose as high as I safely could by myself, by jacking up each wheel and putting a ramp underneath.  That got me to 10.7 degrees nose up.  I put 10 gallons in the tank (which was way overkill I realized), disconnected the fuel line at the carb, and opened the valve to drain the fuel back into the gas can.  I timed how long it took, and also kept an eye on the fuel flow readout on the G3X.


I observed that at 10 gallons in the tank, the flow rate was 28.8 GPH, and it gradually decreased as the quantity went down.  At 1 gallon remaining, it was still flowing at 25.4 GPH, and it never went below 24 GPH until the tank was totally empty.  Good enough!!

Friday, September 3, 2021

The Last Rivet!

 There was only one rivet left so I let my daughter install it!


Friday, August 20, 2021

Fuselage Move to Airport!

I am pretty much out of tasks to do in the garage on the fuselage, so it's time to take it to the airport!  I rented a trailer and got some dudes from work to help, so it was real easy.


Thursday, May 16, 2019

Moving!

This was a project.  We moved from Little Rock, AR to Abilene, TX, and there was no way I was going to let the movers get anywhere near the plane, so I moved it myself.

I ended up renting a 16' flatbed trailer to move everything on.  I think that was pretty much the perfect size, at least without an engine mounted.  I strapped the main gear tires to the forward wall of the trailer, so the engine mount hung out over the tongue of the trailer.  Without the engine that was fine and it made it easy to secure everything.

Anyway, I strapped the front down by the tires and the engine mount.


Next I made two individual wing stands, pretty much copying the idea of the stand I already built that holds both wings.  I didn't want to cannibalize the stand I already built since I'd need it at the new house.  I pretty much built these out of scrap wood I had laying around anyway.  I bolted these stands to the deck of the trailer on either side of the fuselage using self drilling bolts, and then strapped the stands to the sides of the trailer as well to help keep them upright.


I used several straps per wing to contain them in every direction, and also put some moving blankets folded up between the leading edge and the straps to help prevent any chance of them getting dented somehow.  It took me a while to figure out but it worked!


For the rear of the fuselage, I stacked up some wood just high enough to get the tailwheel off the floor, then strapped the tail down using straps crisscrossed around the stabilators.  I bolted a few tiedown rings to the floor to give me something to strap to.


With the big parts secure, I neatly piled up all the remaining large flat parts, long pushrods, flaps, and ailerons under the fuselage and strapped everything to the floor with some moving blankets between the layers.


With the plane all the way forward I had a couple feet of empty space at the back of the trailer, so I piled up more boxes of parts there, along with my other wing rack (mostly disassembled), and my wife's beehive (full of bees) in the back.


I had to stop a few times along the way to adjust and tighten straps and stuff, mostly holding the wings, but eventually we made it!


Here's everything in the new garage.  It'll probably be a little while until I get back to serious work but I'll have plenty of room here!


Overall this was a decent amount of work but it was totally doable.  This was a 500 mile move so it only took a day, but once everything was secured I think I could have driven it indefinitely...  With that said, I hope I can have the plane done before the next move!

Tuesday, March 28, 2017

RH Wing Inspection

I haven't had much time lately to get anything done, but I did have a local EAA technical counselor and FAA inspector stop by today and take a look at my wing before I close anything up.

He recommended I replace a few of the bolts along the spar that don't protrude past the nut at all, but otherwise everything is looking good!

Friday, December 30, 2016

Hardware (1)

1 hour

I got a package in the mail with a bunch of hardware I had ordered from Aircraft Spruce.  It was a lot of stuff so I sat down for a bit and broke it down into zip lock bags for each page of the plans.  I think this will make it go faster later!


Hardware bagged according to what assembly it goes with!

Wednesday, December 28, 2016

Backordered parts (1)

1 hour

I got a box today containing most of the parts that were backordered when I got the kit, so I laid everything out to take inventory.


Friday, December 23, 2016

Pallet Work Table (1)

1 hour

I took my huge pallet apart, trimmed the OSB sheets down to match the width of my sawhorses (42"), hauled everything down to the shop, and built myself a 10' long table.  Pretty easy!


Wednesday, November 30, 2016

More unpacking and inventory (3)

3 hours

Finally got everything moved inside and unpacked!  Inventory complete, and it looks like I'm only missing two small parts...  Not bad for a shipment of over 500 parts!

This huge box contains, the canopy, fuel tank, and fiberglass parts which I won't need for a while.  It can stay in the garage for now!

These plastic drawer units and white shelving parts were all just laying around the house not being used.  Both came in handy for storing small parts and long parts!

The big flat parts take up almost no space behind the couch.

Plenty of space to work!

Tuesday, November 29, 2016

Airframe Kit Delivery! (5)

5 hours

Alright well life and work got busy, so after over a year of neglecting my project I'm back at it.  On the plus side, after saving my pennies during a fun and exciting summer job in Afghanistan I was able to order the rest of my airframe kit!

The timing actually worked out pretty well, since Sonex recently released their B-models and they also put on a fall sale right when I was looking to order.  So I saved a bunch of money and got myself a B-model, which didn't exist when I started.

I'm now officially building Waiex-B #21!

The kit arrived this afternoon which gave me an excuse to ditch work early and help the guy unload it into my garage.  It came in four boxes on a 4'x10' pallet, plus a long crate which contains the assembled wing spars.  We took all the boxes off the pallet and just carried each of them plus the pallet into the garage, since I don't have a forklift.  It was no problem between me and the delivery guy, anyway.

All the boxes in the garage


Wing spars and the leading edge skins

Fuel tank and wing ribs, which were buried in one of the big boxes.

The contents of the other long box

Then I spent the afternoon and evening moving everything into my basement shop and inventorying all the parts.  I got almost all the parts moved downstairs, but I'll have to take the long parts around the backyard since they won't fit through the house.  I didn't feel like doing that today though since it was raining.

Some of the stuff moved downstairs


BUT, after several hours I have gone through all the parts that I moved inside, which is almost all of them.

Taking inventory!

Parts

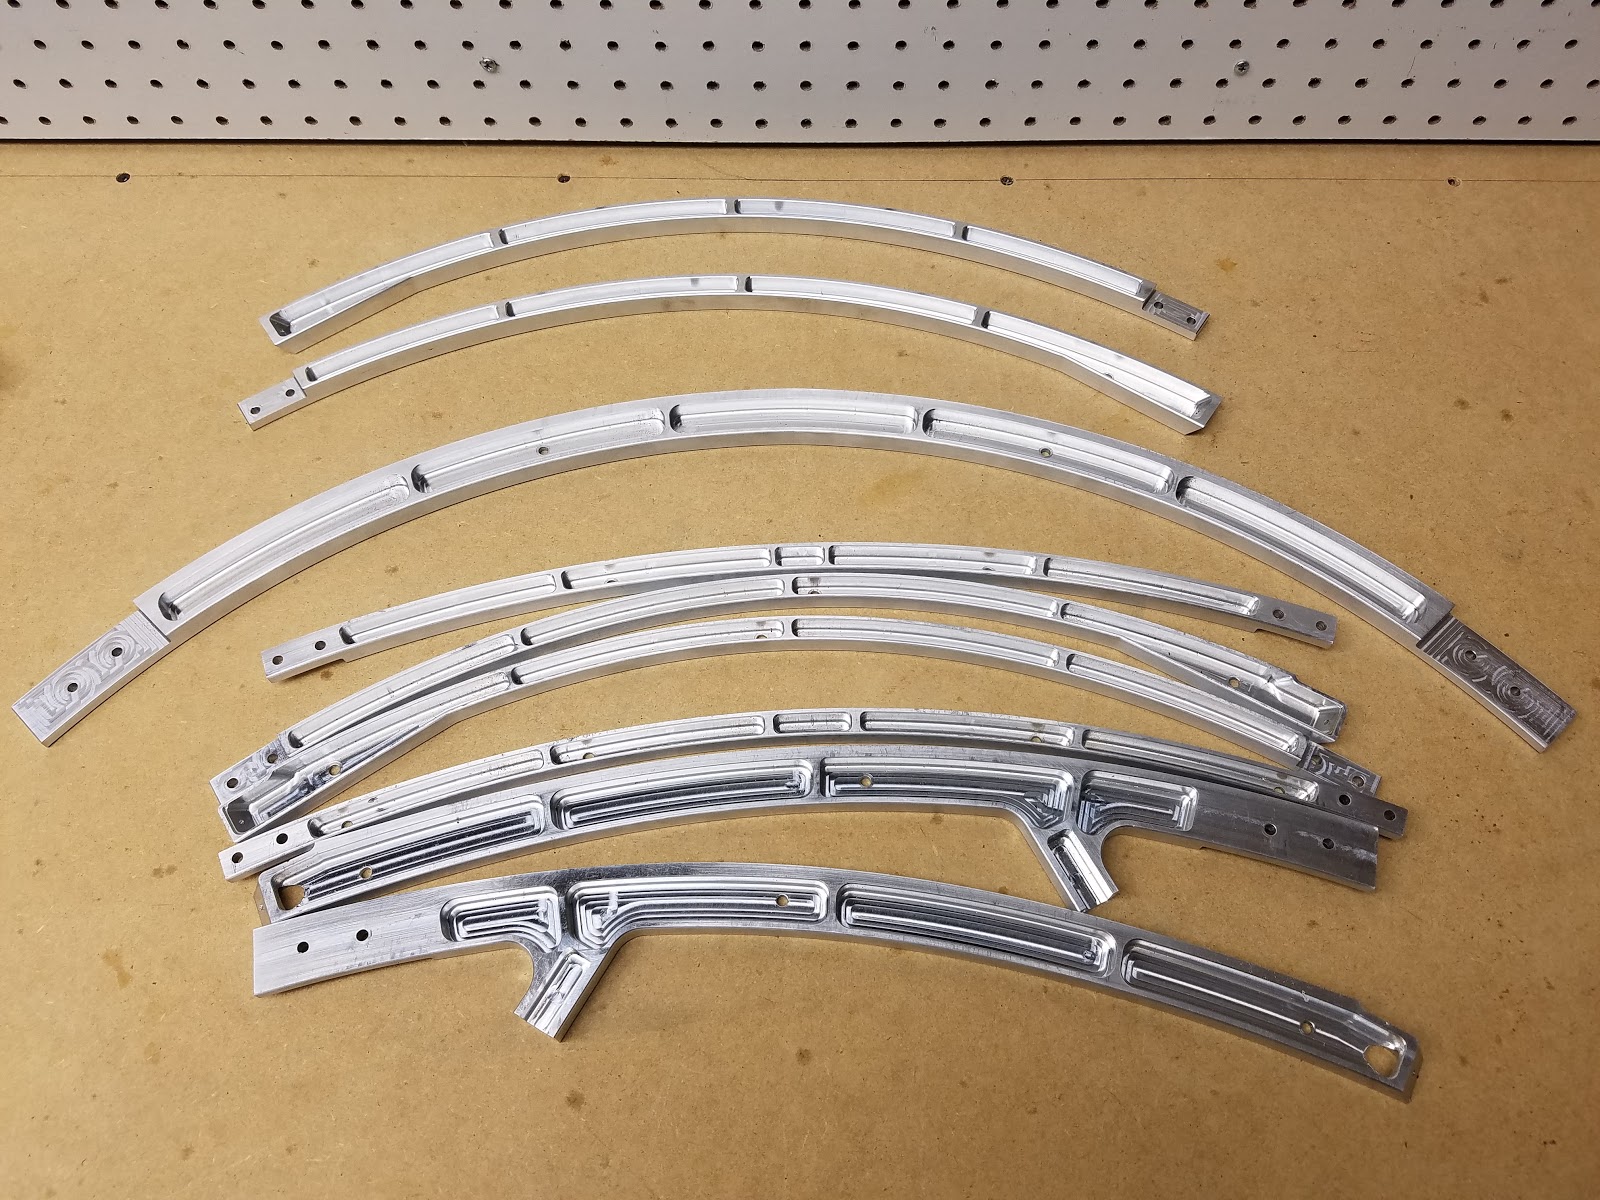
One of the changes that Sonex did with the B-model was add a lot of pretty cool billet aluminum parts.  These will form the canopy frame (the old version used tubing and took a lot of messing around to make the canopy fit).

The best and strongest type of rivets.

Just a few rivets included.

The pretty adorable landing gear.  The only extra-cost option that I've bought so far is the 6" machined tailwheel, and it actually looks pretty nice!