Showing posts with label Ribs. Show all posts

Saturday, July 8, 2017

LH Leading Edge & Root Ribs (4)

4 hours

Back at it again after a vacation and some other stuff.  I updrilled the leading edge skin to #32, and updrilled everything I could reach on the root rib attach angles to #30.  Then I removed the leading edge skin.

The root ribs on the left side are a bit trickier than the right because the attach angle faces the opposite way so, the hardware attaching the angle to the spar is very difficult to get at.  I realized while disassembling that with the ribs riveted to the angles, there'd be no way I could torque them back on properly.  I decided it would be easier to bolt the attach angles on first and torque everything for the final time, and then rivet the ribs to the angles last.  This also required me to remove the wing attach block since that would've blocked access to where I needed to rivet.


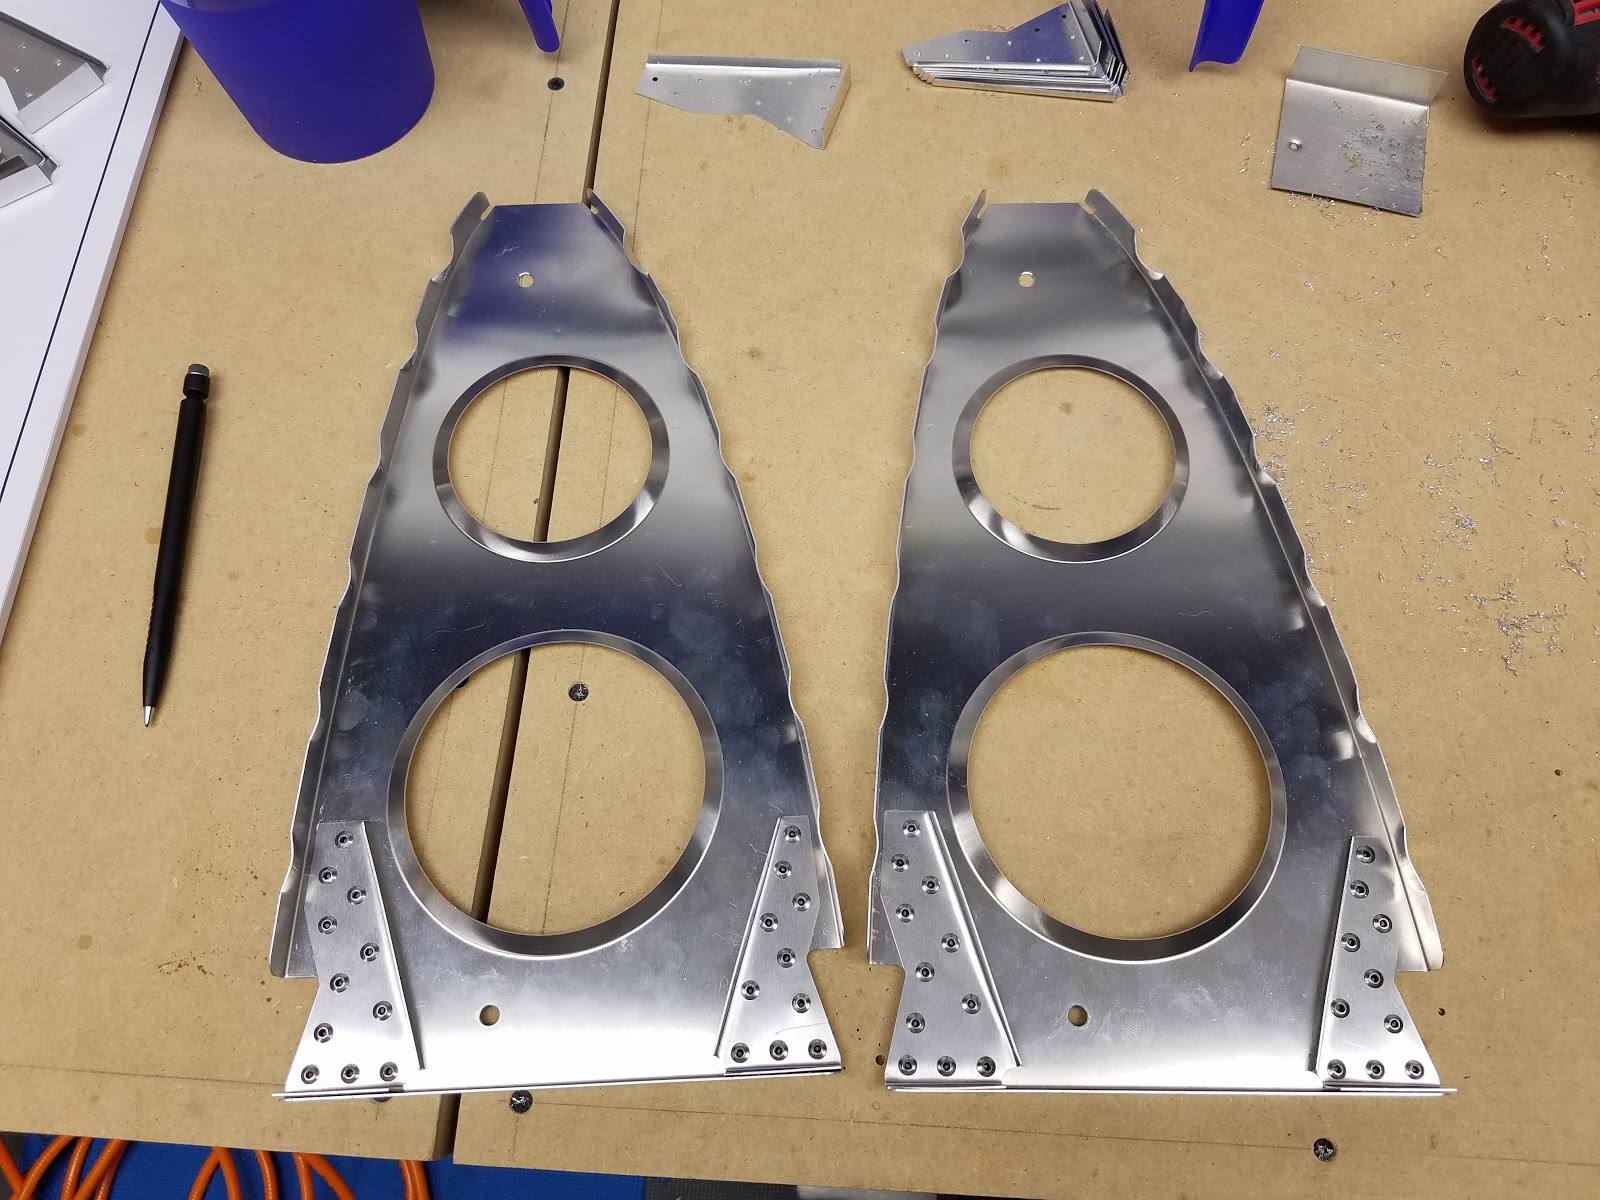
Anyway, I took all the root rib components apart, cleaned up all the holes, and then riveted the reinforcements only where the attach angle doesn't overlap.  Now they're ready to go back on the spar.


Another thing that caused me some extra work that I didn't run into on the right wing was, with the attach angles facing outboard, they block the last hole on the main spar where the skins overlap.  So I had to file some relief area on both ends of the forward angle  to fix that problem.  I think it's good now!


With all that done, I finally bolted the attach angles back on the spar and then riveted the ribs to them.


The two rivets in each corner were tricky to get at, but with my skinny rivet puller and little wedge tool I got them done without too much trouble. 


Saturday, March 11, 2017

RH Tip Rib Part 2 (2)

2 hours
With a little more sanding I got the tip rib pretty well fit and pilot drilled to the skin.


It fit great everywhere except a couple spots right at the leading edge, so I made a couple shims out of scrap sheet to fill in the gap.  I think if anything it might need a tiny bit of body filler but that's a problem for much later!


I was puzzled about how to drill the tip to match the pilot holes in the flange at the end of the main and rear spars.  While looking at the other wing tip to see what I could figure out, I noticed that I could see through it if I held it up to a light!  So I pulled the tip back off, put a flashlight behind it, and reinstalled it.  Then I could easily see the shadows of the holes I was trying to match.


 The tip rib is done for now, until I got back and updrill the whole leading edge.


Wednesday, March 8, 2017

RH Root Ribs (2.5)

2.5 hours

Root rib installation.  Unlike the legacy Sonex plans, the B-model plans have you fit the skins first and then go back and install the root ribs using the skins as a guide to locate them.  This was fairly easy.  The main attach angles and the ribs were all pilot drilled, and the holes lined up well enough that I could get several clecos through each.  Then I drilled the ribs to the pilot holes in the skin. 


With the aft root rib clecoed all the way around, I was able to drill the back end of it to the rear spar attach angle, which was blank.  After drilling into my own finger and bleeding all over everything, I had the root ribs fit!


The last thing to add was the little reinforcement angles that I bent a few weeks ago.  The pilot holes lined up well enough on these parts as well.


Then I removed both ribs to rivet them to the reinforcements and the main spar attach angles.


Then I reinstalled the ribs.  I used new locknuts on the main spar attach angles, since this ought to be the last time they're ever removed.  Finally, I riveted the aft rib to the rear spar attach angle.


Done!

Monday, February 27, 2017

Pitot/Static System Part 1 (0.5)

0.5 hours

Not a whole lot to do here yet since my pitot/static tube is still on backorder from Aircraft Spruce, but I did need to get these tubing holder tabs on before I put the ribs on for good.


Aileron Bell Cranks Part 3 / Aft Ribs #9's Part 2 (0.5)

0.5 hours

Aft Ribs #9's done!!


These rivets inside of the channel were tricky to get!

Sunday, February 26, 2017

Aileron Bell Cranks Part 2 (3.5)

3.5 hours

I went back and replaced all four bushings in these bell cranks, and started over reaming them to try and get the cranks to turn nicely.  I got some good info here:


It took a while but eventually I got both of them moving freely with no slack!


Thursday, December 29, 2016

Aft Wing Rib #9's (2)

2 hours

The #9 aft ribs get a bunch of these reinforcing channels as well as the aileron bell cranks.  I got the channels pretty much done.


Tuesday, December 27, 2016

Root rib gussets (0.5)

0.5 hours

I just had a few minutes tonight to sneak into the shops and crank out these last few gussets!  These ones are made of thicker material than the other gussets, so bending the tiny flanges with my little hand seamer was kind of a pain.  But I got em eventually!


Wing Ribs Part 3 (1.5)

1.5 hours

I had a little time this morning to knock out a few more ribs!


Monday, December 26, 2016

Saturday, December 24, 2016

Wing spars and wing ribs (3)

3 hours
I drilled some of the parts to the right main spar, then I made all the little reinforcing gussets for the forward wing ribs.  Then I started riveting them to the forward ribs!


Wednesday, August 5, 2015

Stabilator Leading Edge Ribs (0.5)

0.5 hours

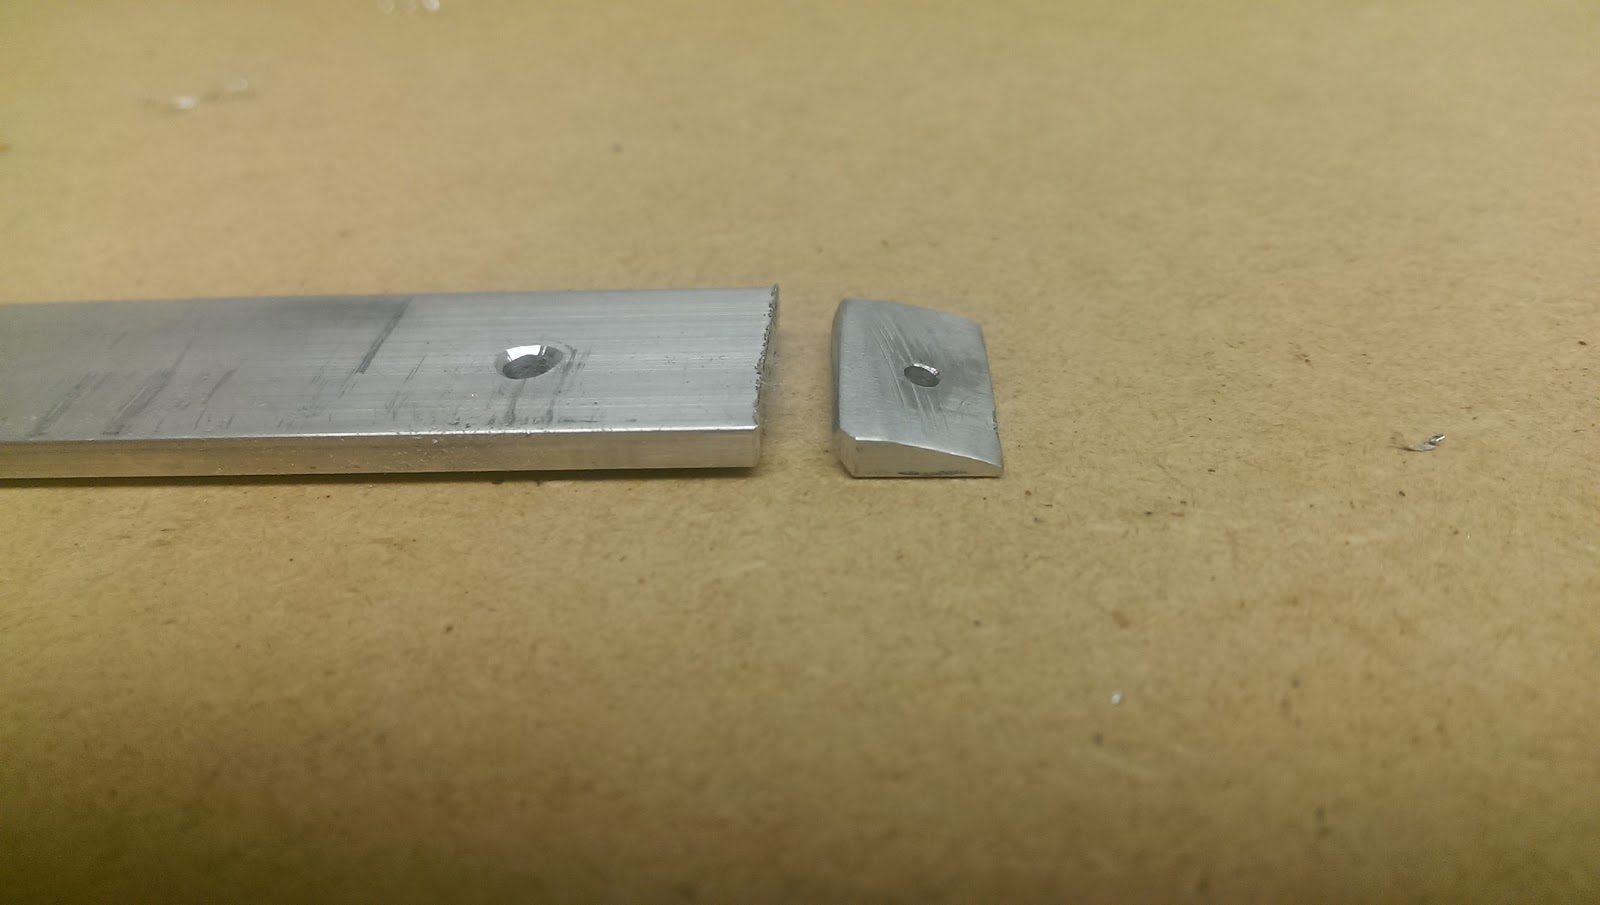
I figured out how to pull those last rivets on my leading edge ribs.  After watching this video, I went and picked up a piece of 1"x1/8" aluminum for a couple dollars at Home Depot.  Then I ground an angle on one end of it, drilled a #40 hole in the face of the "ramp" (perpendicular to the angled face), and cut it off with the bandsaw.  After a few minutes of cleaning up and rounding off the edges with the Scotchbrite wheel, I had my little wedge that would allow me to pull the rivet with my gun at and angle, while still keeping the rivet aligned in the hole.


Then I drilled a #30 hole in the remaining piece of bar stock.  This is just to hold a rivet so I can bend the stem over slightly with my fingers, like this:


Now my little wedge and bent rivet stem fit together like this...


...allowing my rivet gun to pull the stem from an angle that clears the rest of the part.


Done!


Note: I also found an idea for a more elaborate adapter, here.  I might try to make one of these later, but Home Depot didn't have any aluminum that thick and I didn't feel like driving to another store today!

Saturday, August 1, 2015

Finishing stabilator ribs and spar caps (1.5)

1.5 hours

Today I rebuilt the last stabilator rib (actually the very first one I built) which I had done kind of badly back when I first started. I also managed to straighten out the one rib that got a tiny bit bent while in storage. So now I have all the stabilator ribs done (as long as they all fit and I don't have to redo any).


Next I started cleaning up the spar caps. They come laser cut with pre-drilled pilot holes, but that leaves a lot of serrations on the edges and flashing around the holes. The bending brake also left some marks, so I'm working on buffing them out. I got a good start but there's still a bit more to do.


Once the spar caps are all done I'll be back to where I left off, which is assembling the internal structure of the stabilators!

Wednesday, July 29, 2015

Back to work after a huge break! (1.5)

1.5 hours

Alright it has been about 3.5 years since my last post!  It has been a busy time so the Waiex got put on the back burner.  Long story short, I got commissioned in the Air Force, moved from Wisconsin to Oklahoma, went through pilot training, got my wings, moved again to Arkansas, and finally have my own house again and little chance of moving for a few more years.  So I haven't made any progress on my long term airplane project, but I did accomplish one of my long term life goals of becoming a military pilot!

Anyway, I have been gradually setting up a new shop in the basement, and it is pretty much usable now.  I'll post some pictures of it later.  Today I finally busted all the parts out of storage, where they have sat through two moves and three years, and took an inventory of what I had packed up.  I think everything made it without any significant damage, except one stabilator rib flange that got a tiny bit bent.  I'll see if I can straighten it out but if that's all I have to do over then I'd call that not too bad!

Next I started catching up to where I had left off.  I was working on creating all the C-channel ribs for the stabilators.  Having almost no memory of how I built the ones I have done, I sat down with a ruler and the drawings and checked all my work.  Everything looked good from what I can tell, except for the very first rib I built which I knew was kind of off as soon as I built it.  So I will rebuild that one and maybe the one that got a little bent.
That's all for now!  It's good to be working on this thing again!


Wednesday, January 18, 2012

Stabilator spar channels & root ribs (3.5)

3.5 hours

Not too exciting... More c-channel stuff. Got the root ribs done and the spar channels mostly done! 

Cutting channels to length and bending flanges.


Cutting the ends of the spar channels.

Saturday, January 14, 2012

Stabilator Ribs - Part 2 (4)

4 hours

Worked on more ribs. I'm kind of getting the hang of it, but it's hard to really tell if anything will fit until I get them all done and try putting them together!

Here are the pieces of channel cut to length with the Hand-Powered Miter Saw.


Now I just have to do a few more 68° bends and these will hopefully be all done.  Like I said I can't really tell how well everything will fit until I try to put it all together.  I have one 48" piece of channel left though so if only a couple are hopelessly off I should be able to just remake them.

Friday, January 13, 2012

Stabilator Ribs - Part 1 (2)

2 hours

I pretty much spent this evening figuring out how to make these ribs out of the C-channel that comes in the kit.

The rib I ended up making didn't turn out perfect, but I think I learned how to make the next ones turn out better. I'll probably end up going back and remaking this one later.


I also spent a lot of time messing around with my band saw to get it adjusted properly. It works much better now than it did before!