12.5 hours
This is another one of those tasks I had been dreading all along. I heard it was pretty tedious to fit the canopy, and that was true! It took me about 12.5 hours over the course of a week to finally get the plexiglass canopy to fit nicely on the frame. In total I had the canopy on and off the plane about 20 times.
I started by trimming the canopy very roughly to fit the opening in the fuselage, using a Dremel oscillating tool with a metal blade on it. I ended up cutting about an inch off the whole perimeter of the canopy. The oscillating tool worked pretty well, it just wasn't very fast. I didn't follow the factory recommended bandsaw method because it would've taken two people and I had to do this part on my own!


After the initial cut, I just set the canopy in place, marked all the edges with masking tape, removed it from the plane, and then trimmed to the tape. For the continued trimming I switched to an angle grinder with a 60 grit flapper wheel. It removed material pretty quickly and was a little easier to control than the oscillator. It made a HUGE mess though. For smaller trims I used a palm sander with 80 and then 220 grit sandpaper.


 |
| The three tools I used to shape the canopy |


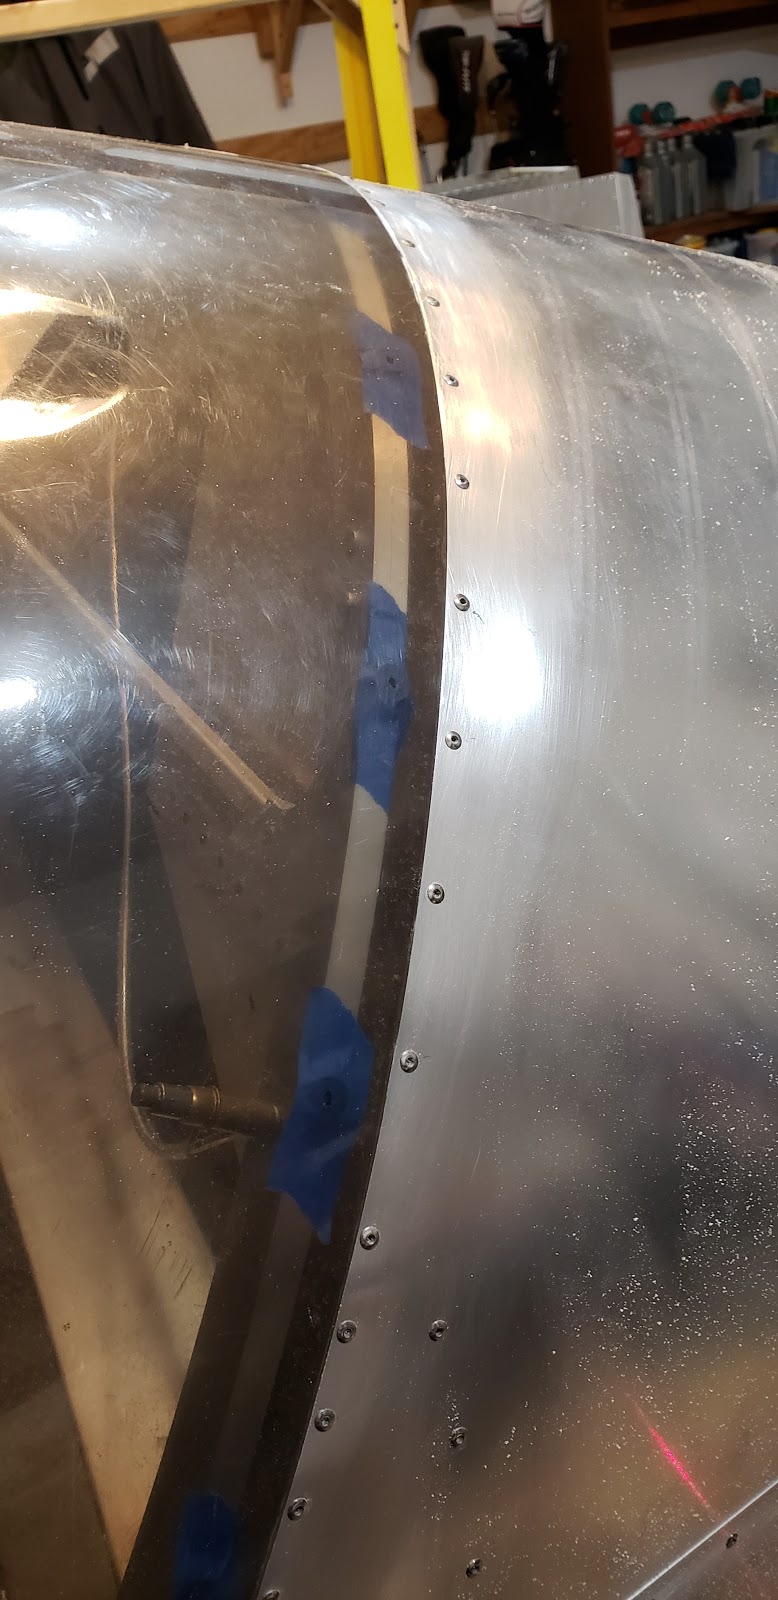
Eventually, after about 5 or so iterations, the canopy finally fit between the windshield and the turtledeck, so I could actually tape it in position and make more precise marks. I continued making small trims and after several more iterations I could start drilling through the canopy to match the holes in the frame and cleco it in place.


I started at the top center hole at the front and back, and worked outwards from there. As I constrained the canopy in place further to each side, it became apparent that more and more material needed to be removed from the bottom corners. This is pretty much what John Monnett said would happen in the Sonex instructional video. Anyway this went on for many more iterations, until I was finally able to fully cleco the canopy down.

Around this point I realized that the canopy sat noticably lower than the top of the windshield and turtledeck in a few places. I wanted it to line up as nicely as possible, so my solution was to add rubber washers where needed to space the canopy from the frame slightly. I found two different thickness of washers at Home Depot, and using them where required I got the canopy to match up pretty well with the profile of the fuselage.


Next, at the very bottom aft corner on each side, the frame actually pushed the canopy out slightly too far, so I had to remove the canopy and just file some metal off the frame to improve the fit. I guess I don't have an after pic to go with this before, but eventually I go it to what I considered acceptable.

Finally I had the whole canopy fit!


The final tasks for the plexiglass piece were to enlarge the holes and countersink them for the countersunk washers. I read many horror stories of people cracking the canopy while updrilling the holes, so I tested a few different drill bits on pieces of scrap. Even trying extra hard to be overly aggressive and using brand new sharp bits, I couldn't get my scrap pieces to crack. In the end I just used a slightly old regular bit to updrill the holes and I had no issues. To countersink the holes, I actually was pretty scared of cracking, so I just did it by hand with my little deburring tool. It took about a minute per hole but it wasn't too hard, and nothing cracked.

No comments:
Post a Comment