Monday, December 31, 2018

Fuel Vent Line (2)

2 hours

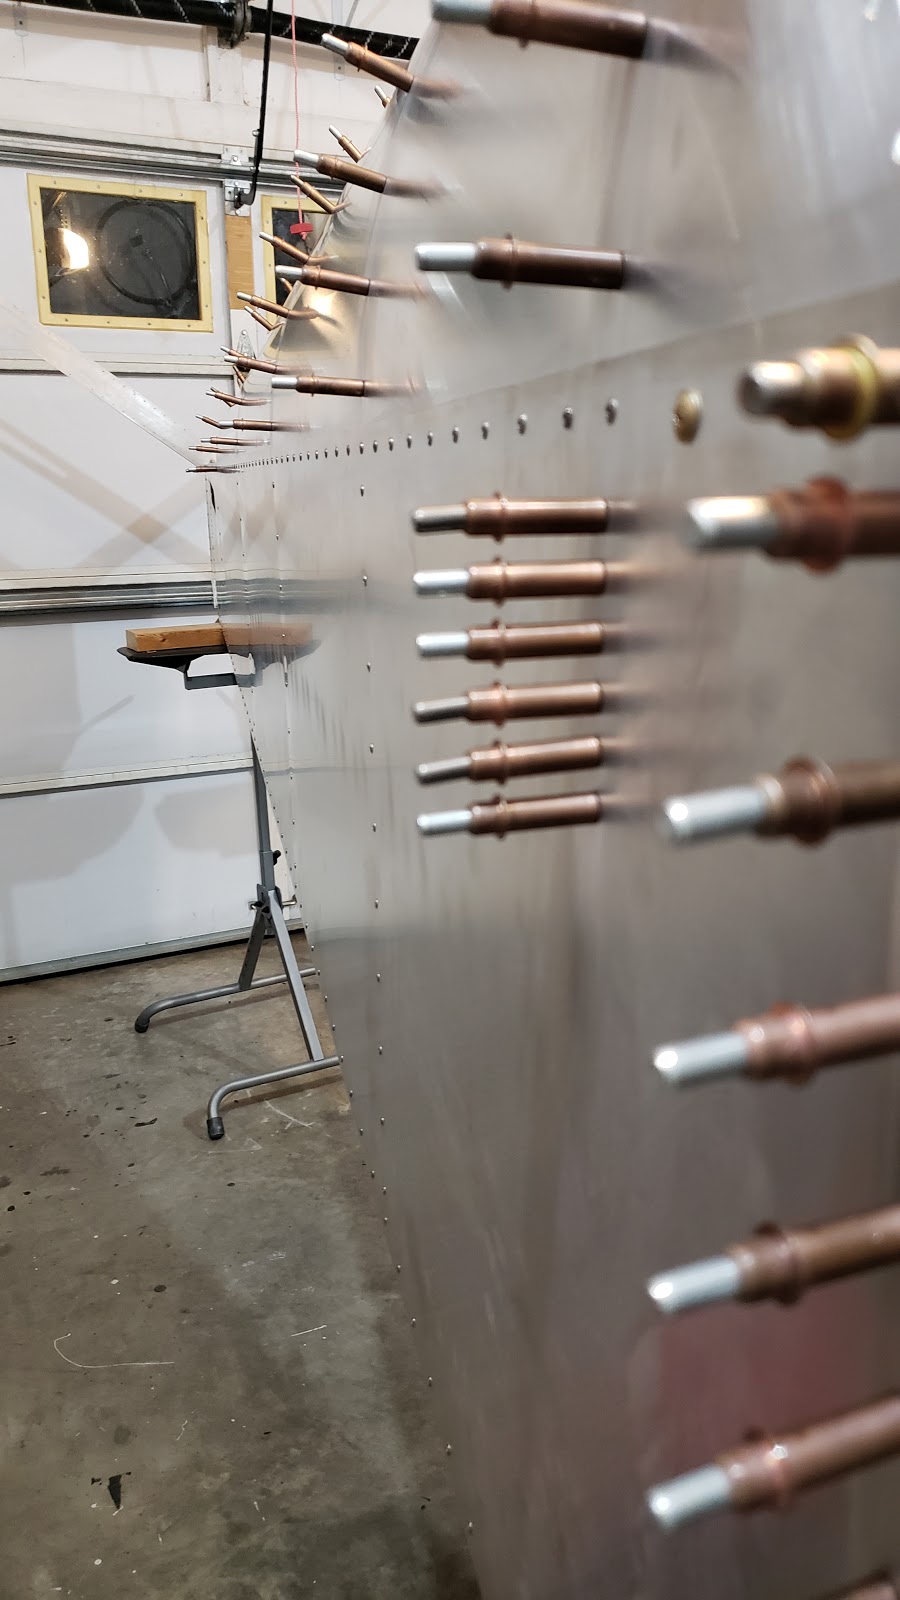
Before I install the windshield, I need to run this little vent line.  The plans don't exactly spell out where to route it, but from what I could tell it needed to go through the upper longeron, down the inside of the side panel, and through the lower longeron just aft of the landing gear leg.  I called Sonex tech supprt and they confirmed it was OK to drill through the longerons, so that's what I did!

The plans are not super clear on what fittings you need for the fuel lines, so I had to sit down and figure out exactly what to order by browsing Aircraft Spruce.  Here's the final answer:


The vent fitting is a -4 AN flared fitting.  I don't have much experience with these kinds of lines and fittings, but I did know I'd need a flaring tool to create the flares on the ends of the hard lines.  After a few minutes of research, I decided the Rigid model 377 flaring tool was a good choice.  I ordered one from acmetools.com for about $110 shipped, which was the cheapest I could find it.

Anyway, the flaring tool is expensive but at least it's super easy to use.  I tested it on a little piece of line and it seemed to work great so I pressed on!


With that figured out, I went ahead and ran the line from the vent fitting, through the fuselage.  I used a little tubing bender that I already had to create the bends above the glareshield since I wanted at least that area to look nice.  Once it made its way into the fuselage though, I had to pretty much manhandle the line to get it routed all the way through and out the floor.  But in the end it doesn't look too bad.  I secured the line inside the fuselage with three little P-clips.


Sunday, December 30, 2018

Control Stick Grip (2)

2 hours

Since I'll need the stick installed to finish my mixer setup, I figured I might as well work on it while I wait for more hardware to show up.

The plans don't specify what length to cut the grip tube to, they just say make sure it clears the instrument panel with your chosen grip installed.  I'm using the same grip that Sonex used on their factory plane, so I guessed that whatever's depicted in the plans will work for me.  I measured the plans, and it's 130mm protruding from the aluminum part.  I held half of my grip up to the stick at that length, and it looks about right!


I cut the tube to that length with a hacksaw and drilled it to the aluminum part with the taper pin reamer.  I had an extra taper pin lying around that was broken, so that's temporarily installed for now until I get a new one.  I installed the grip, and I think it looks pretty good!  I'm going to run a wire through the stick for a couple buttons, but I didn't get around to that yet.


Saturday, December 29, 2018

Control Mixer (2)

2 hours

Before I install the aft fuselage floor for good, I want to get the control mixer at least mostly set up while I have full access to it.  I installed the mixer in the fuselage, and attached the rudder cables.  I wanted to get the elevator pushrod installed, but I realized I actually need to drill the hole in the pushrod that'll attach it to the mixer, and to have it in the right place I need to have the stick plus the stick-to-idler pushrod installed.  I didn't have the hardware for that on hand so I ordered it and will get the elevator pushrod done later.


Friday, December 28, 2018

Aft Fuselage Riveting (6.5)

6.5 hours

Now that the fuselage is in the garage I don't have to worry about fitting it through a door anymore, so I can go back and rivet all these parts I fit ages ago.  I started with the turtledeck.  It went back together pretty quick.  This was about 600 rivets in total!


Tuesday, December 25, 2018

Move to Garage (1.5)

1.5 hours

I'm back at it again after another two months away for work!  My parents visited for Christmas, so I took advantage of the extra help to finally move the fuselage from the basement to the garage.

This ended up being much easier than I expected.  I thought it would take like four people but my dad and I pretty much got it with some spotting from mom.

We started by removing the aft fuselage and setting it on the floor.  Then we set the forward fuselage on the floor and moved the sawhorses to the garage.  Then we carried the forward fuselage up and set it back on the sawhorses, and finally carried the aft fuselage up and reattached it to the forward half.  No big deal!


Yes I'm doing this in my Christmas pajamas


Monday, October 22, 2018

Glare Shield Covering (1)

1 hour

I didn't get many pictures since my hands were covered in glue, but I went ahead and covered the glare shield in black fabric.  I was debating between this and flat black paint, but I decided to go with fabric since I was sure I'd eventually scratch paint by setting stuff on the dash.  I picked up some matte black, slightly stretchy fabric from JoAnn that worked pretty well.  I used 3M Super 77 spray adhesive, which is very sticky!  I found that just spraying the aluminum only and applying the fabric didn't work very well at all.  The fabric just lifted right up.  However, a second coat on the metal plus a coat on the back side of the fabric caused it to stick extremely well!  So well in fact that I almost ruined the whole thing by trying to lay it down too quickly.  Anyway, it was kind of tricky but with some help from my wife we got it to lay flat without any wrinkles.  Then I trimmed around the edges with a sharp razor blade.  Now I just need some edging for the aft edge and around the fuel filler cutout and we'll be set.


Saturday, October 20, 2018

Fuel Tank, Part 2 (3)

3 hours

Confident that the tank now fits in the fuselage, I took it outside and rinsed it with the garden several times to flush out the debris from drilling the three holes, and whatever else was in there.  I then installed the three "oops" fittings according to the instruction sheet on Sonex's website.  Their method worked well and I didn't have any problems.


Next I figured I should leak test the tank before I put it back in the plane for good.  I plugged two of the fittings with plugs from the hardware store, and hose-clamped a piece of tubing on the third fitting.  I rubber banded a nitrile glove over the filler opening, and blew into the hose to inflate the glove.  Then I just folded the hose over and clamped a Vice-grip on it to seal the tank.  I measured the circumference of the inflated glove and wrote it down, and let it sit overnight to see if the glove deflated.


In the meantime, I glued some felt onto the tank straps.


The next morning, I measured my glove balloon again and it was the same size as when it started, so I called my leak test a success.

I put the tank back in the plane, marked where the vent port hit the glare shield, and removed the tank.  I clamped a piece of scrap wood under the glare shield and used a 1-1/4" hole saw to cut a hole for the vent port.  Then I joined the hole to the filler cap cutout with the nibbler and some files.


Next it was time to mess with my glare shield stiffener some more.  With the tank straps fully tightened it still touched the top of the tank just a bit, which I wasn't comfortable with, so I did several test fits removing some material each time.  I ended up with the center about 3/8" tall, tapered down to pretty much nothing at the ends.  This fits pretty well and although it isn't totally rigid it definitely improves the shape of the glare shield overall.


With that figured out, I tightened the tank straps for the final time, riveted the stiffener and tank stop angle, and called it done!