Sunday, May 28, 2017

LH Root Ribs and Root Doubler (2)

2 hours

I got the root ribs pilot drilled to their attach angles, and the root doubler/wing walk is fitted and updrilled!  The root doubler was much easier this time since I didn't accidentally updrill all the holes in the skins first.


LH Wing Skins, part 4 (2)

2 hours

More drilling.  I got the bottom side of the leading edge pilot drilled, the lower aft skin updrilled, and the top and bottom of the main spar updrilled.


Wednesday, May 24, 2017

LH Wing Skins, part 3 (1.5)

1.5 hours

I put the wing back on the stands this time so I could do both sides of the leading edge without having to flip the whole wing.  So far I got the top side fully pilot, then ratchet strapped it closed and cleco'd the bottom side to the main spar.


Tuesday, May 23, 2017

LH Wing Skins, part 2 (1)

1 hour

I flipped the wing and got the lower aft skin pilot drilled.  Then I put the wing back on my stands, leading edge up.  This time I'm going to try fitting the leading edge this way so I can get at both sides at once...  We'll see if it's any easier than doing it flat on the table was.


LH Wing Skins, part 1 (2)

2 hours

Upper wing skin drilled to the wing!  This time I planned ahead and refrained from updrilling holes where other parts still need to be fit.


Sunday, May 21, 2017

LH Wing Squaring & Leveling (1)

1 hour

Just like the other wing, before starting on the skins I had to make sure the wing was both square and free of any twist.  I started by leveling the main spar the long way, and then I used a plumb bob to locate the pilot hole at the end of the rear spar at wing station 19.0.

I assumed the brace I made for the other wing would set this wing right where it needed to be, but it was actually about 1/2" off.  I spent a little time trying to figure out why, and then I gave up and just adjusted the length of my brace to set this wing properly.

Then I put the wing flat on my table and shimmed the main and rear spars until they were level with each other throughout the length of the wing.  Finally, I pulled the upper aft skin out and cleco'd it to the rear spar so I can start drilling it tomorrow.


Saturday, May 20, 2017

LH Wing Structure, part 2 (5)

5 hours

Not much interesting to show from this long session, but I got the whole wing structure drilled together, updrilled, deburred, and riveted! 


LRI Tubing Tabs (0.5)

0.5 hours

The next non-standard option I plan to add is a lift reserve indicator in the left wing, mirroring the pitot tube installation on the right.  Before I got too far a long on the left wing structure I wanted to go ahead and add some mounting tabs to the inboard few ribs to support the tubing that'll eventually go to the LRI.  Since the airframe kit only came with four tabs, I just traced the plans onto some scrap material and made an extra four for this wing.


Thursday, May 18, 2017

Lighting Connections (1.5)

1.5 hours

I got a bunch of stuff in the mail, including my wingtip lights from Aircraft Spruce, and a bunch of Molex connectors from Digi Key.

It's been a while since I messed with connectors like these, but after a little trial and error I pretty much figured out how to crimp the pins onto the wires.  I used a 4-wire connector for the wingtip light, and a 2-wire connector for the landing light.  I think once I install the wing on the fuselage I'll run both cables into a 6-wire connector, so I only have one electrical connection per wing whenever I need to remove and install the wings in the future.


LH Wing Structure (2)

2 hours

With the right wing out of the way, I got started on the left wing structure.  It's going much faster the second time!  I got all the spacers and about half of the ribs pilot drilled to the spar.  The 12" long drill bits that I bought since I did the other wing made it a bit easier to drill through the rib flanges.


Wednesday, May 17, 2017

Wing Rack, Part 2 (2)

2 hours

I finished building the wing rack.  With all the parts cut out yesterday, it was a cinch to put together!  Once my wife got home from work, I got her to help me get the right wing on to the rack.


Tuesday, May 16, 2017

Wing Rack (1)

1 hour

With the right wing just about done, now I need a way to store it.  Like many other builders have done, I'm going to build this rack:

http://sonexfoundation.com/uploads/wing_stand_snx815_revA.pdf

I dug through my scrap wood pile and found all the plywood and 2x4's I needed!  Both my circular saw and miter saw are at work for a different project, so I cut everything on my little table saw.  Cutting 2x4's on a table saw is not very easy and it's definitely not safe!  I almost launched a couple of them across the garage, but with some extreme care I got everything cut without destroying anything.

Tomorrow I'll go out and get the hardware to put this thing together.


Riveting Wingtip (1.5)

1.5 hours

The last piece of this wing is the fiberglass wingtip.  I had to save this for last because it would have blocked where I put my stand earlier to wok on the wing vertically.

I picked up these wingtip light mounting pieces from here: http://www.gaugepods.com/aircraft.html 

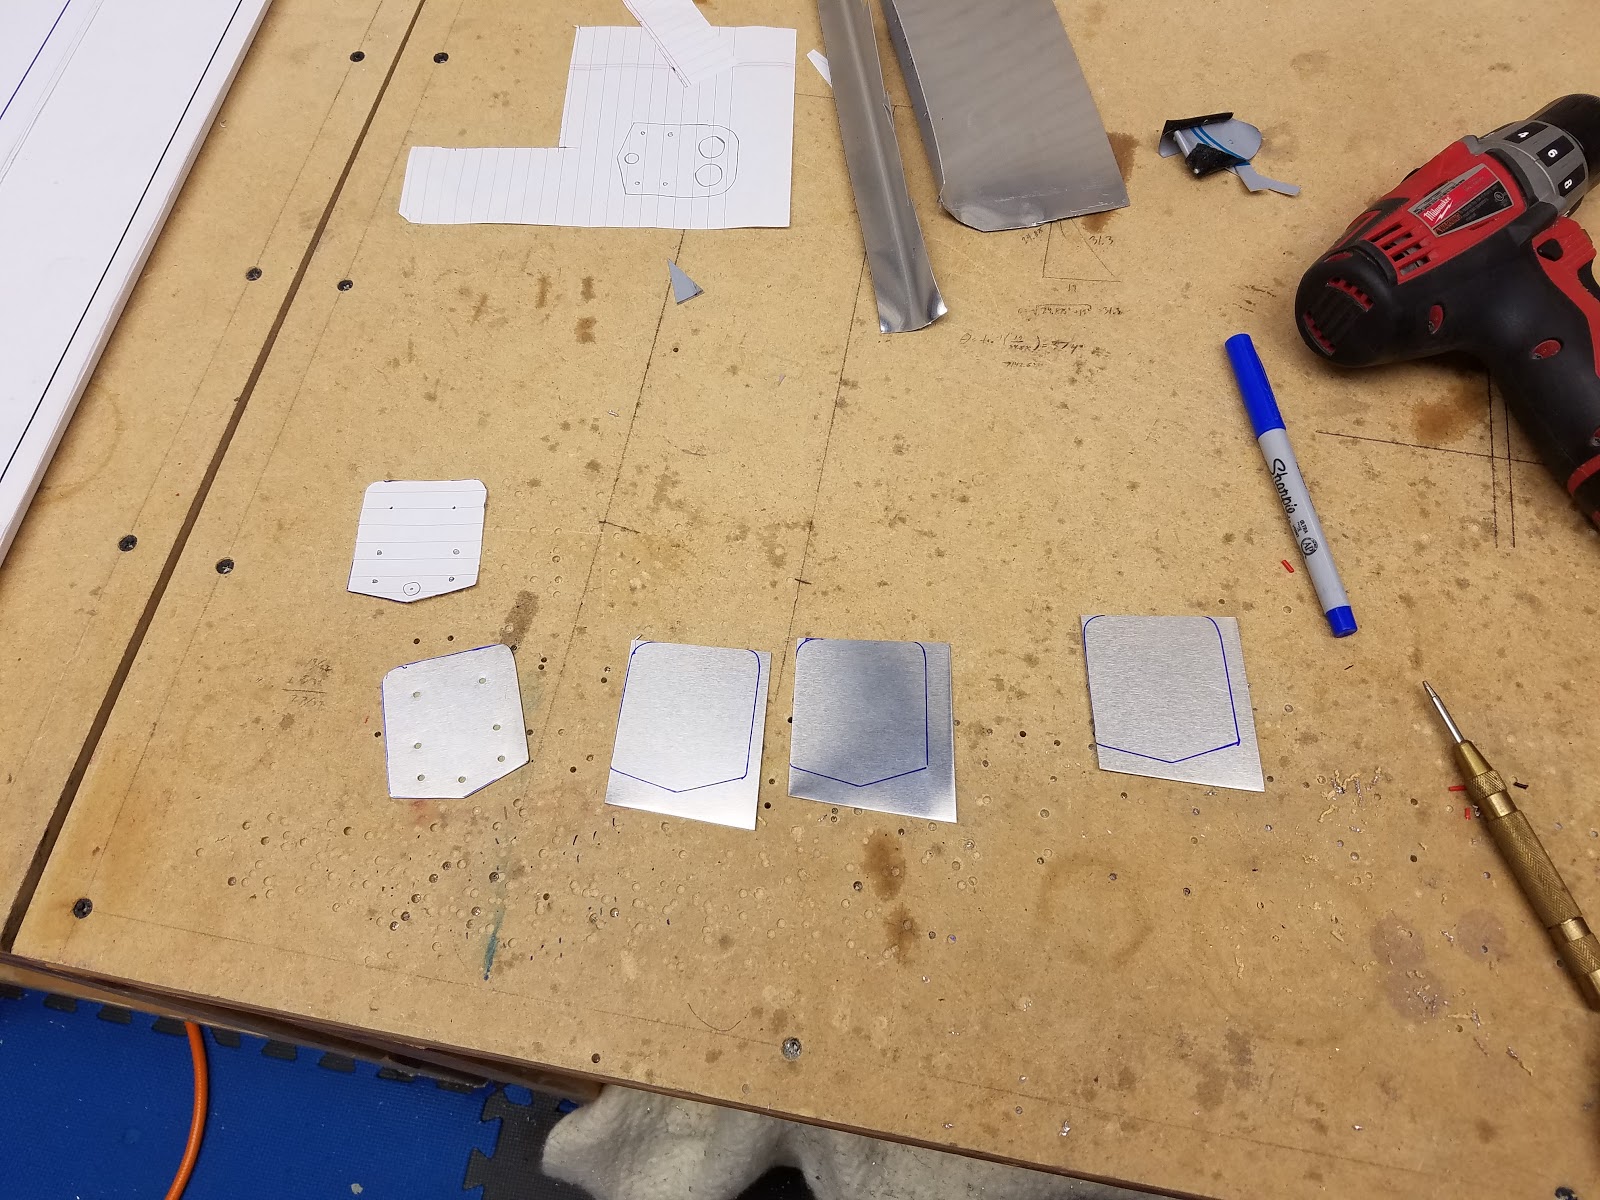
I intend to install my wingtip lights to these things, and then attach them to the wingtips with nutplates.  That way I can put an access hole behind the mounting piece in case I need it later to disconnect the light for some reason.

I'm not very creative so I figured the best place to mount this thing would just be the center of the wingtip.  I started by marking the front, rear, top, and bottom points of this thing, using a complex arrangement of lines that I drew on my workbench.


Then I drew lines on the wingtip locating the vertical and horizontal midpoints, lined up my marks with the lines, and clecoed both parts together.


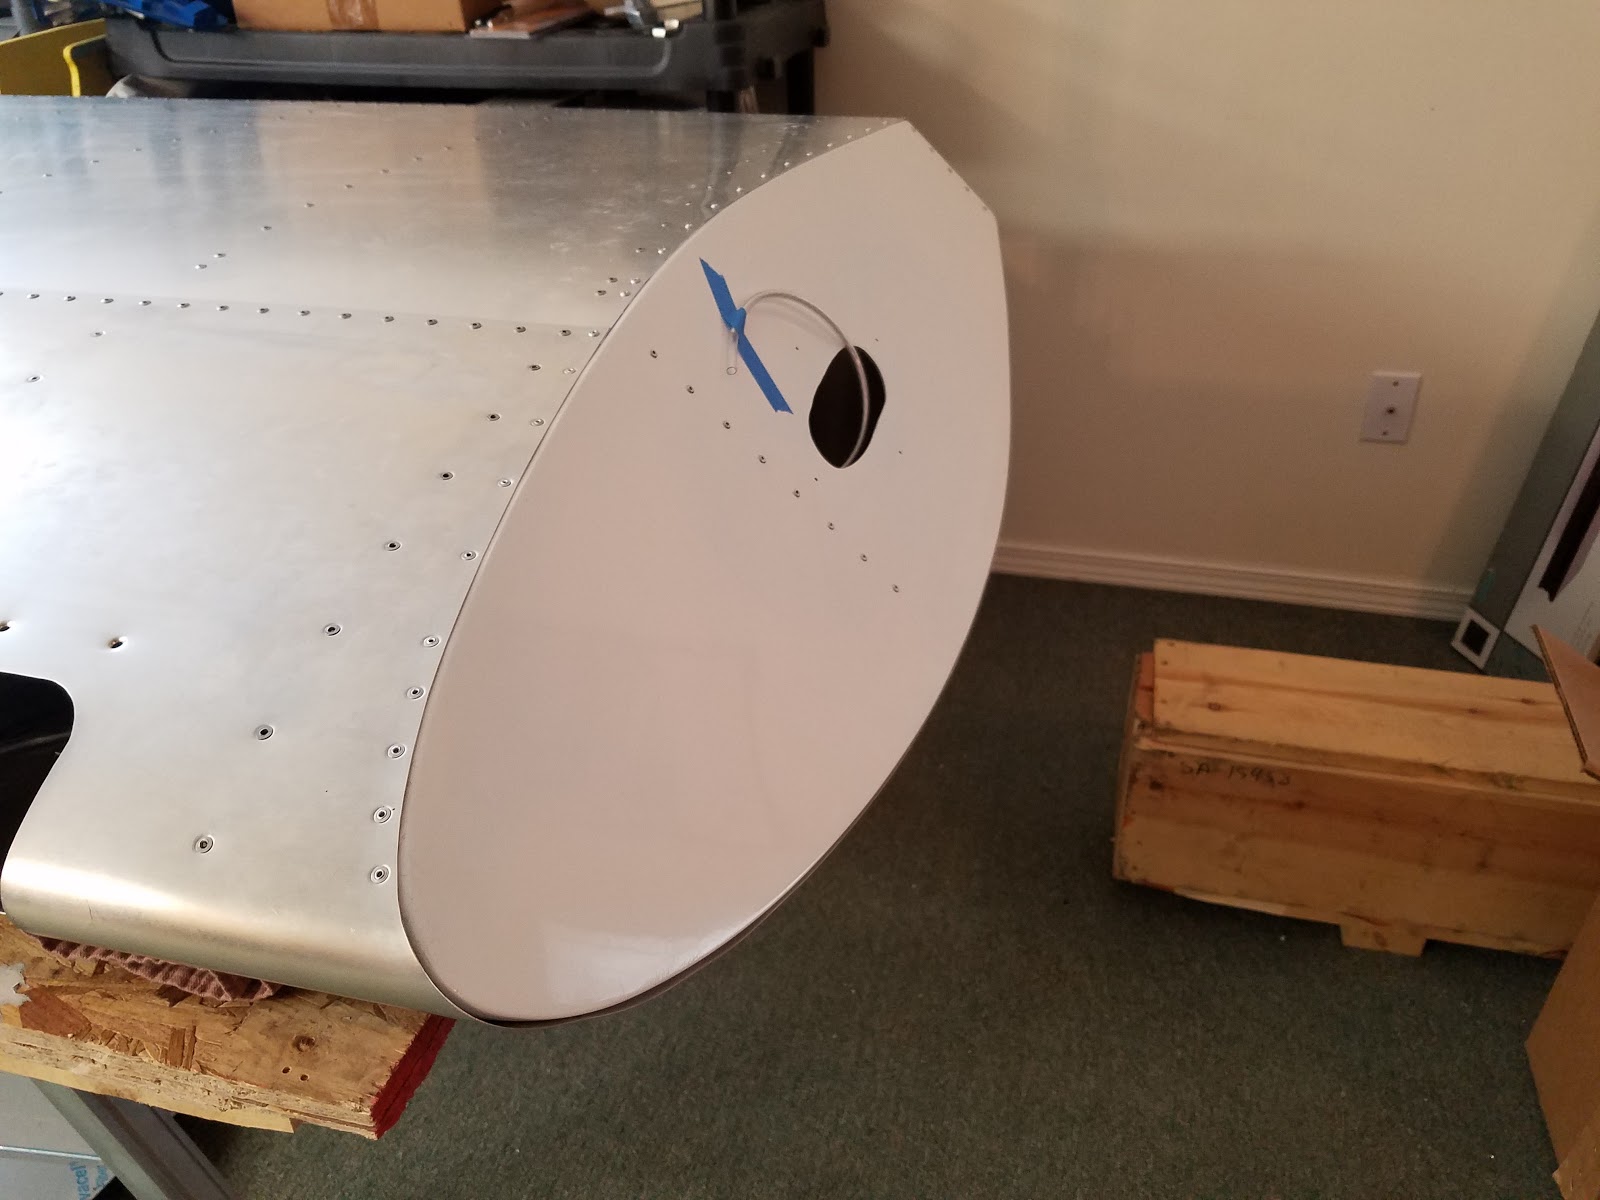
For my access hole, I traced the outline of the mounting part, removed it, and then used my most artistic skills to draw a big oval inside it.  I kept it about an inch inside each hole that I drilled.  The I took it outside and cut the hole out with a Dremel cutoff wheel followed by a little sanding drum.


I don't have my electrical connectors, nutplates, or the actual lights yet, so that was about it for now.

The last thing was just to rivet this thing onto the wing.  I was a little concerned about the stainless steel rivets used everywhere else on the kit cracking the fiberglass when I installed them, so I opted to use aluminum rivets instead which are a little more gentle.  These Avex Aluminum Rivets worked perfectly.


Now this wing is pretty much done!!!

Riveting​ Leading Edge Skin (3)

3 hours

It's finally time to put the last skin on this wing!  I wrangled the forward skin back on the wing again, and went at it.

I did the row along the main spar on both sides first, then the upper flush rivets, and the lower flush rivets last.

As soon as I started on the upper flush rivets, I had several of the rivet stems break off proud of the surface.  I was surprised because I drilled all the holes with a #32 drill instead of #30 prior to dimpling, and I did several tests on scrap material that came out perfectly.  My only theory as that my in-out deburr tool must have enlarged some of the holes a tiny bit.  I ended up with about 25 rivet stems sticking out, and two that pulled completely through without breaking (out of about 77 total).  After a few rivets with the pneumatic puller, I switched to one of my manual pullers.  It seemed to mess up less rivets but who knows.  It definitely took longer!

I was able to tap most of the stems back in with a punch, and the rest I very carefully ground down with a Dremel grinding wheel.  The two that pulled through, I just drilled out and replaced.


Bizarrely, when I did the lower rivets every single one came out perfect.  I drilled, dimpled, and deburred the top and bottom exactly the same so I have no idea why!  But it's done now anyway!