Monday, January 28, 2019

Main Gear Alignment (1.5)

1.5 hours

Messing with the alignment some more.  I put the plane back on sawhorses, and started taking more precise measurements.  I realized that with the gear legs flush with the top of the engine mount, the vertical distance from the floor to the end of each axle was about 1-1/4" longer than what the plans called for.  My initial reaction was to insert the legs farther to correct that dimension, which puts them about 2" above the top of the engine mount!  After reading some comments on the forum however, it sounds like taildragger Sonex's have too flat of a deck angle on landing anyway, and taller main gear would only help.  I think I'll put them back where they were, and accept the slightly higher nose attitude on the ground.


Sunday, January 27, 2019

Windshield Installation (3)

3 hours

With those couple of parts painted and the snap vents installed, there wasn't really any reason left not to install the windshield!  I tapped the #6-32 holes in the windshield bow after painting so I wouldn't have to worry about paint in the threads.  Everything fit back together fine, I just couldn't reach two of the nuts near the front on each side by myself to tighten everything down.  I'll get them later when I have some help.


Saturday, January 26, 2019

Windshield parts (0.5)

0.5 hours

I'm sick of thinking about the landing gear, and it's really nice out (60 degrees!), so I thought I'd go ahead and paint these couple parts before it gets cold again.  I want to paint as much stuff that'll be visible from the cockpit flat black, to reduce glare.  This is the windshield bow, and I also painted the strap.


Friday, January 25, 2019

Windshield Snap Vents (0.5)

0.5 hours

Before installing the windshield, I wanted to install these little snap vents.  I figure it's less dangerous to cut the holes with the lexan laid out flat than under tension once installed.

These are the vents I ordered.  All they need is a 3-1/4" hole to install into.  I just used a regular 3-1/4" hole saw to do it.  I was a little worried that I'd end up with a sloppy fit, but it turned out just fine!  I placed the hole so it would be 1" away from the windshield skirt on all sides.


Main Gear Installation (6)

6 hours

I spent most of the day messing around trying to get the main gear installed.  I thought I had the correct bolts to install the engine mount for good, but somehow they were all like a full inch too long...  I don't know what I  was thinking when I ordered those.  So for now I installed the mount using my hardware store bolts, and I'll swap them out one at a time when the new ones show up.

Anyway on to the gear itself.  I thought it might be easiest to drill and install the axle assemblies to the legs first, so I could drill them on the drill press.  My axles didn't have pilot holes drilled in them like the plans indicated, so I drilled my own 3/16" hole.  Then I inserted the gear leg all the way and clamped the assembly to a v-block on my drill press, using a very scientific rig to hold the leg level.


I carried the 3/16" hole through the leg, which was slow going but not too bad on the drill press.  It probably took about 15 minutes per hole.  Updrilling to 1/4" only took a minute or two.


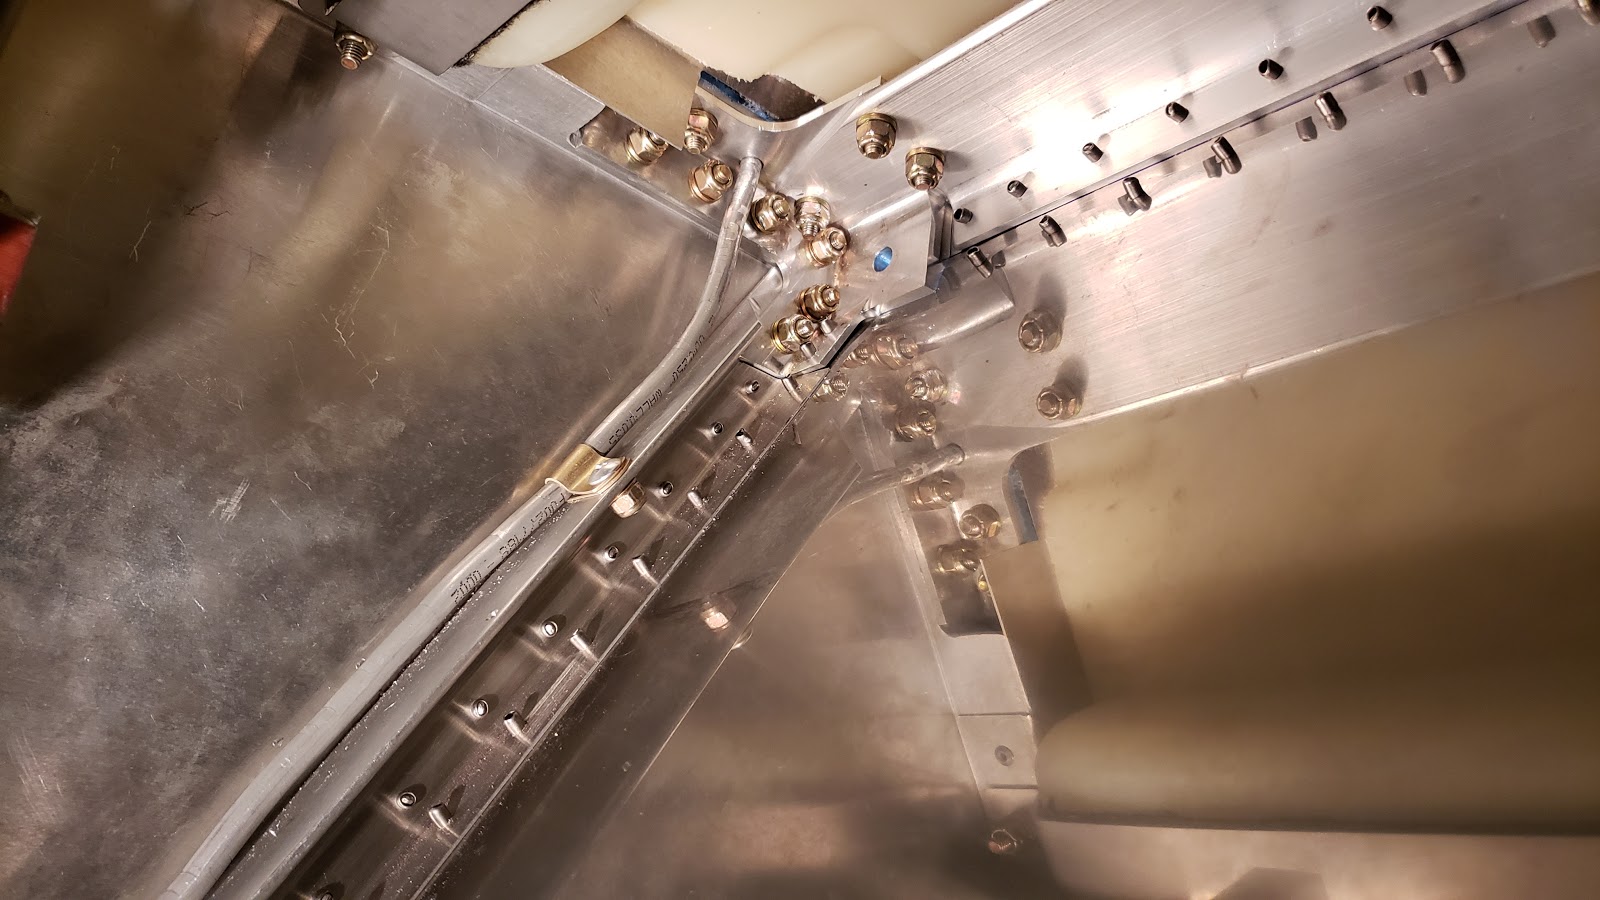
Next came installing the legs into the engine mount.  This is where I spent most of the time.  The sleeves that the legs fit into were painted on the inside, so the legs weren't even close to fitting inside.  I tried a bunch of different methods of sanding the insides of the sleeves.  The best way I found was to take the little honing tool I used on the rudder pedal blocks, and wrap it with 220 grit sandpaper.  Then just spin the crap out of it inside the sleeve.  Eventually I got both legs inserted.  It's a very tight fit, which is good, but I had to remove the axles so I could pound on the end of the leg with a rubber mallet.

Anyway, I got both legs inserted until they were flush at the top, which is where they seem like they should be according to the plans.


Then I reinstalled the axles, and threw the brake calipers and wheels on.  My plan was to do the 2x4 method of setting the alignment which is explained here and here.


I spent an hour or so trying to do the alignment using the 2x4's to control the angle of the tires, but I had some issues.  First, I didn't feel like the 2x4's had much grip on the tires.  I could move them quite a bit before putting any real torque on the gear, and it took a LOT of force to rotate the legs within the engine mount.  I also realized that I had to jack up the plane any time I needed to adjust the height.  Overall I found it to be too difficult to do accurately, so I think I'm going to go back to the factory method of setting the toe-in alignment.

Saturday, January 19, 2019

Forward fuselage side panel bolts (1)

1 hour

I had my wife around to help for a little while, so we got these few bolts installed in the upper corners of the side panels.  I had to leave them out until the windshield skirt was installed for good, and with the glareshield now in the way, there was no way I could reach both sides by myself!

Most of these were a huge pain to get a wrench on...  The nuts have very little clearance around them.


Sunday, January 13, 2019

Aft Fuselage Floor (1)

1 hour

With the mixer installed I went ahead and reinstalled the aft fuselage floor.  Everything still lined up!

I riveted the nutplates around the mixer access panel but left the rest cleco'd for now, just in case I think of anything else I need to get at later.


Control Mixer, part 2 (2)

2 hours

I had to order a few bushings and things before I could attach everything to the mixer, so once I got that stuff I went back and rigged everything.

The long elevator pushrod needed to have a hole drilled in it to set its length, and with the tight quarters I had to get a little creative with a right-angle adaptor for the drill and a short bit, but once I got the pilot hole drilled I just removed it and drilled the final hole outside

The only other issue I ran into was that the large washers on the ruddervator pushrod ends obstructed the full range of elevator travel.  I had to hammer the washers into a dish shape to build some clearance, and luckily my wife had the perfect tool for that in her arts and crafts pile.  I later found out they sell washers in this shape for the exact same reason (rod-end bearing clearance), but these will work.  Once I got that figured out I got everything attached to the mixer!


Sunday, January 6, 2019

Upper Firewall (2)

2 hours

I thought this was going to take like five minutes but it actually ended up being a pain!  With the tank installed, the glareshield is now pushed into a slightly different shape than it was when I drilled all the holes for the upper firewall, so about half of them didn't line up anymore.  I had to remove and install the upper firewall a bunch of times to figure out where to drill new holes, and then drill them very carefully to avoid drilling into the tank which was right there.

Eventually I got the firewall riveted, but the tank is so close to the back of it that a few of the rivets didn't even fit all the way into their holes.  I tried pulling them anyway, but two of them got stuck without being seated all the way.  I'm sure I'll have to slide the tank back a bit later to install things to the upper firewall, but for now I couldn't possibly drill these rivets out without hitting the tank.  So I'll fix them later!


Saturday, January 5, 2019

Fuel Filler Edging (0.5)

0.5 hours

Just a quick project today.  I got this rubber edging from Amazon and wanted to install it before I put the windshield on for good.  I just used super glue to attach it.  I think it turned out pretty nice!

Here's what I ordered:
https://www.amazon.com/gp/product/B00NL49008/ref=oh_aui_detailpage_o04_s00?ie=UTF8&psc=1