Sunday, October 29, 2017

Turtle Deck, part 5 (2)

2 hours

I got the last of the parts updrilled.  Now I have quite a pile of things that need to be deburred!


Turtle Deck, part 4 (4)

4 hours

Lots more progress on this thing.  I got the rest of the parts fit in the #1 former area, adjusted some of the flanges on formers 2-4 for a better fit, and got everything updrilled at the longerons and formers 2-5.

The only part that didn't really fit was this splice plate that joined the two upper formers.  Everything was pilot drilled, and if I clecoed the parts together it pulled the formers down away from the skin.  I had a chunk of plate laying around that was the same thickness, so I just made a new one by tracing the old one.  I transferred the holes from one side of the plate to the new part, then installed it and transferred the other side's holes from the former.


Thursday, October 26, 2017

Turtle Deck, part 3 (1.5)

1.5 hours

Starting on the #1 former, which is actually comprised of several parts.  The lower formers are the first ones to install, however I noticed that they are supposed to have a bend at the top edge to meet the upper formers, and mine were flat.  The plans didn't call out the bend, but I took my best estimate and put the bend line 3/4" down from the top, and bent the top back 30°.  I think it turned out correct!


Wednesday, October 25, 2017

Control Mixer (1)

1 hour

I felt like working on something else for a bit, so I started on the control mixer assembly.  It went together without too much trouble, but now I just need to get my hands on the correct taper pin reamer so I can install the tapered pin!


Monday, October 23, 2017

Turtle Deck, part 2 (2)

2 hours

I got formers #3 and 4 installed.  It was a pain!  I thought I could get them through the access hole in the floor, but it ended up being pretty much impossible as far as I could tell.  I ended up just pulling the lower skin out from under the fuselage so I could get more access from underneath.  It was still tough to reach a lot of the parts!  Eventually I got all the holes drilled for the #3 and 4 formers.  I think I will try to adjust some of the flutes in the formers a little to try and get a better fit to the curve of the skin in a few places, before I updrill the holes.


Sunday, October 22, 2017

Turtle Deck (2.5)

2.5 hours

Time to start installing the turtle deck.  I started by laying out the skin flat on the floor and marking a line 1" in from each edge to mark the required overlap with the side skins.  Then I moved the fuselage to the floor so I had room in set the skin on top.  I carefully clamped the left side in place and and then drilled the holes through the side skin, turtle deck skin, and longeron.


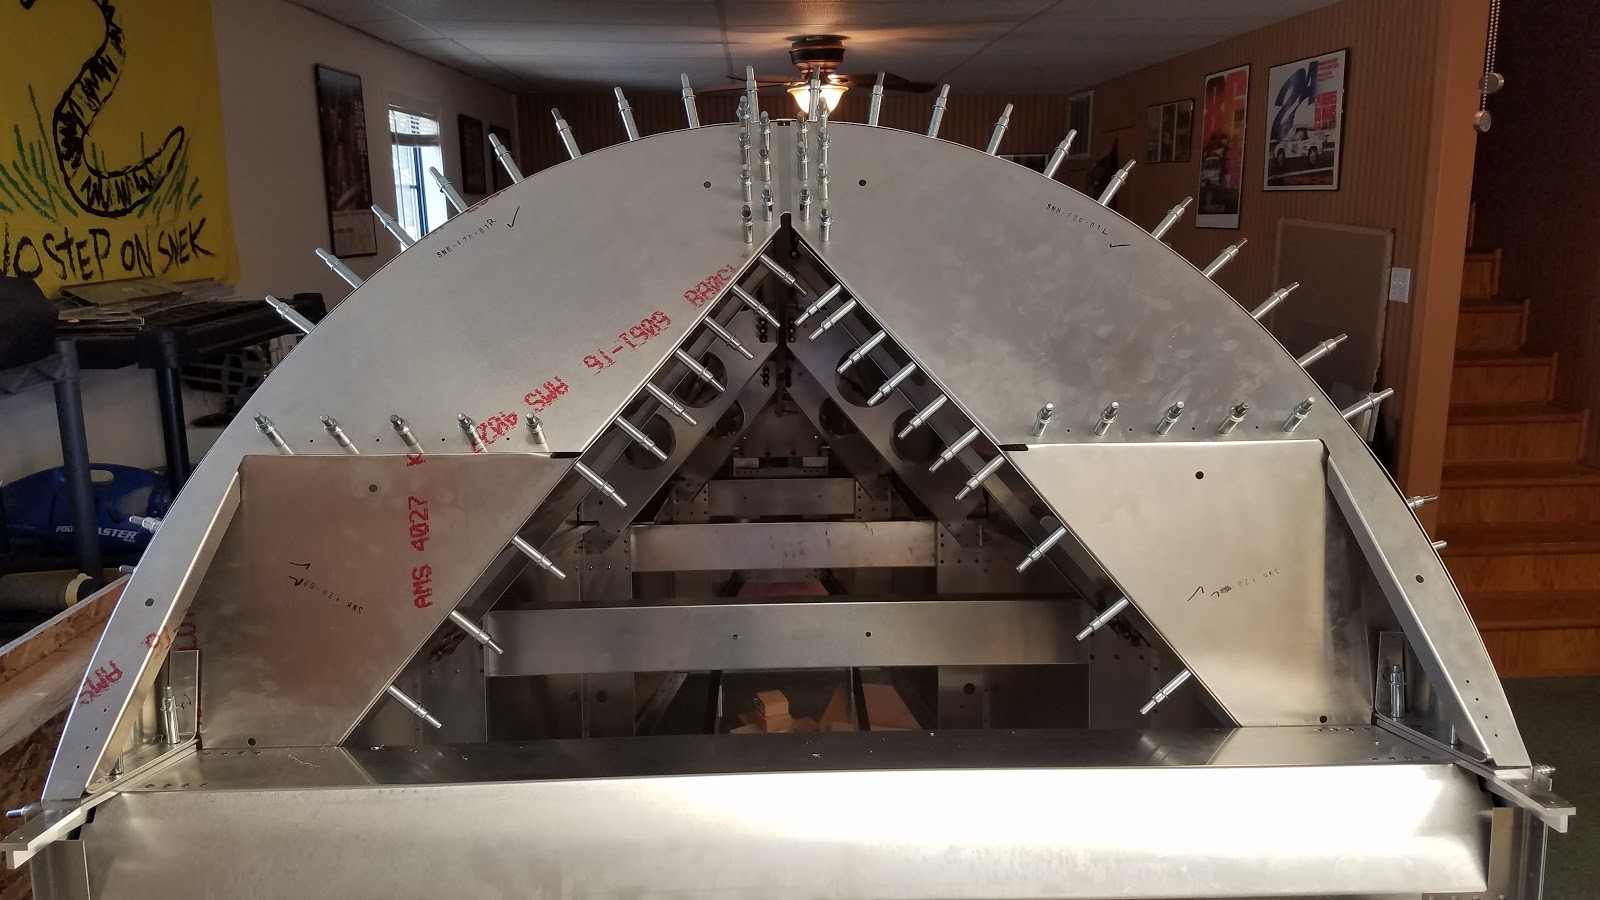
Then I bent the skin over and sandwiched it between the side skin and longeron.  I clamped it in place like the other side and drilled all the holes again.  I thought this was going to be hard to bend like the wing leading edges, but thankfully it was much easier!


Then I took the pallet off my sawhorses and moved the fuselage on top so I could poke my head through the access hatch in the floor and start working on the formers.  I got #5 and #2 installed, which are the easy ones since you can reach in from the ends to get at them!


Saturday, October 21, 2017

Flap Actuator, part 2 (3.5)

3.5 hours

Installing the flap tube mount blocks ended up being a bit tricky.  They were easy to locate, but there was no way to drill the holes through the blocks into the flange they mount to.  I ended up marking the locations, then unbolting the lower splice pieces from the side panels so I could drill the four holes off of the fuselage.

Then I had to sand off the powder coating on the tube where the mounting blocks touch it, so that it could rotate without too much resistance.  I ended up installing and removing the tube like five times to adjust before I got it to move freely.  Eventually it turned out well!


Friday, October 20, 2017

Flap Actuator (2)

2 hours
On to the next steps!  Before the lower skin goes on the aft fuselage for good I need to install this flap actuator tube.  The first step was to install a small angle on each side between the lower splice piece and the skin.  It was fairly confusing at first to figure out how these were supposed to go, but they only really fit one way.


Next I had to finagle the actuator tube through the holes in the side skin to get it into position.  I had to enlarge one of the holes a little to get it through but eventually it went in.


Next I just need to install the delrin mounting blocks and rivet the angles, and this part will be done for now.

Wednesday, October 18, 2017

Aft Fuselage, part 10 (1)

1 hour
This page of the plans is finally done!  The last part was to fit the upper cross tie box and rivet it to the forward Z channels.


Aft Fuselage, part 9 (1)

1 hour

Today I managed to get the shoulder belt mounts riveted on, and I riveted the last of the shear web, bulkhead, and tail post!  Then I started fitting the upper cross tie box.


Monday, October 16, 2017

Aft Fuselage, part 8 (1)

1 hour

Not much time to work today, but I got the rest of the upper horizontal channels cleaned up and riveted.


Saturday, October 14, 2017

Aft Fuselage, part 7 (2)

2 hours

Still chipping away at this thing.  I got the lower skin and longerons all deburred, then removed all the lower horizontal channels and mixer mounts, deburred those parts, then reinstalled and riveted them.  I also riveted together the mixer mount parts that go around the access panel outside of the fuselage and then installed it all as one unit.  Next I'll flip it back over and do the upper channels.