This is actually several days worth of work but I didn't want to make a post for each little work session I did throughout the week.
This thing took a lot of steps to fit!
I started by just installing the windshield skirt between the side panel skins and longerons. The plans, unusually, don't give you any dimensions or info to locate the skirt, but in the end there's really only one place it can go. By measuring the drawing I figured out the portion of the skirt which should overlap the skin is 1" tall, which lines up the with notch in the front of the skirt that forms the flange over the firewall. I measured an inch in from each side, drew a line, and clamped the skirt in place with the line just at the top of the skin on each side (exactly like how I started the turtledeck skin).

The plans say to first just cleco one hole on each side of the skirt, so I did that and then inserted the lexan windshield.


It quickly became clear that without the skirt cleco'd to the longerons, the windshield just pushed the side panel skins out.
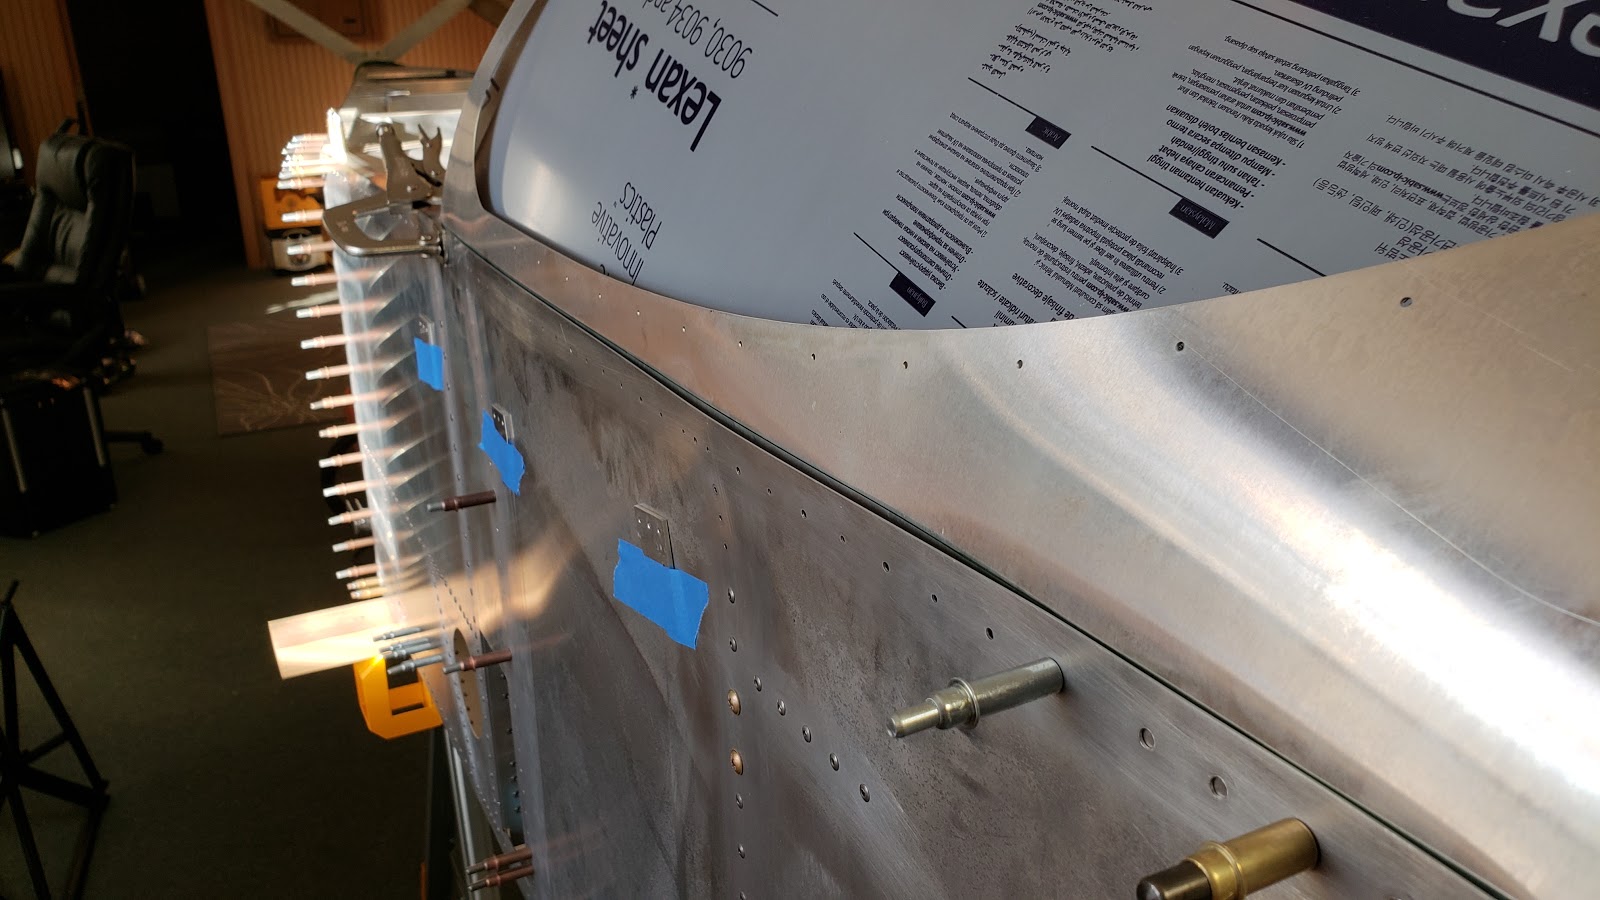

I decided the only way I was going to hold everything in place while I fit the lexan part was to go ahead and cleco the skirt to the longerons on each side. The plans don't actually specify when you're supposed to do this, but I don't think I could have completed the process without doing it at this point!


With the position of the skirt in relation to the fuselage set, the next thing was to place the windshield correctly within the skirt. I found some good tips here that I ended up using. I removed everything from the plane and layed it out flat, then used a bunch of cleco clamps to align the aft edges of the windshield and skirt, and center the fuel door opening.

Then I drilled and cleco'd around the fuel door plus a few holes out on either side.

Then I reinstalled everything. I ended up having to file about 1/8" off the front of the windshield for it to go all the way forward and line up with the holes I just drilled, but that only took a few minutes. I re-cleco'd everything I had drilled up to this point, and then started working my way out from the center at the front of the windshield, drilling one hole at a time and installing a cleco in an attempt to keep everything as tight as possible.

Once I got around the curve at the front corners of the skirt, there was a pretty large gap between the skirt and the windshield.

To try and force the windshield out to meet the skirt, I started stuffing towels between the glare shield and windshield. I shoved them in as hard as I could, using a chunk of 1x4 board as a ram rod. I eventually got like 20 towels crammed in there, which reduced the gap quite a bit.
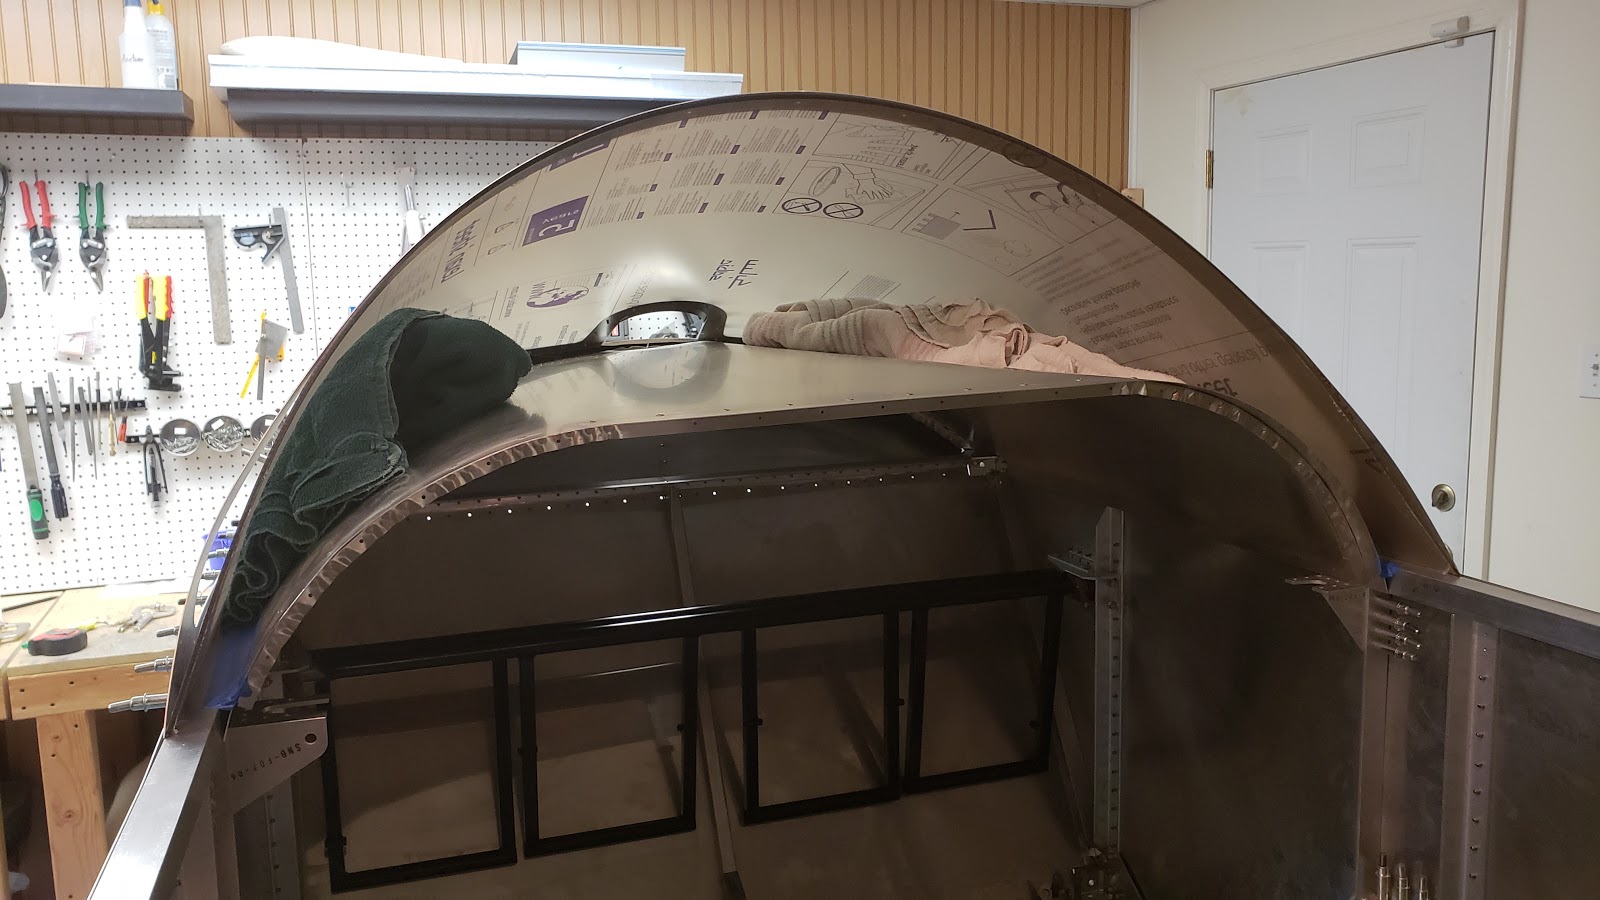
I also tried squeezing the windshield downward with a couple straps, hoping it would cause it to bulge out at the sides, but I don't think this actually did much. I got it as tight as I could, and then just continued one hole at a time, pushing the skirt into the windshield as hard as I could manage with one hand and drilling with the other. I think in the end all the holes turned out fine.


The aft edge was the last area that needed to be figured out. This was tricky because there were four layers that all had to line up, the skirt, windshield, windshield strap, and the machined windshield bow. This took quite a bit of trial and error, but here's how I ended up doing it.
I concluded there was no way I'd be able to hold all four layers together in the right alignment tightly enough to drill them all at once, so I did it in stages. I had marked the centerline of both the skirt and the windshield, and I knew the aft edges had to line up, so drilling those two parts together first was easy. I just lined everything up, clamped them together with cleco clamps, and then drilled from the center outwards.


Next, I skipped the windshield strap for now and worked on the bow. I marked a sharpie line across the bow at the fore-aft position where all the holes should line up, and then I drilled a pilot hole in the very center. That allowed me to cleco the bow to the windshield at the top center and work my way out. Since I already had the holes drilled through the windshield, I just had to line up my sharpie line on the bow under each hole and then drill through the bow. Once I had about three clecos in, it was pretty much fixed since the bow is so rigid. Once I made it all the way to each side I also drilled the bow to each longeron.


The final part was the windshield strap. This is the thing that'll form the flange which the front of the canopy will sit on. My thought was to sandwhich it between the windshield and the bow and then drill it, but I couldn't get that to work so I removed the bow.
The way I fit this piece was I marked the width of the flange across the strap (by measuring the plans since it wasn't dimensioned...), and I marked the centerline too. Then I once again aligned the center and worked my way outwards.


This seemed to work fine, except when I was done the ends of the strap were about 1/4" above the longerons instead of right on top of them. I realized later that this might have been why the plans said to just cleco the front... Maybe I should have had more of the aft end of the skirt overlap with the side skins to bring the strap down. BUT, then neither the bow nor the windshield itself would have fit underneath the skirt. So I think this result is about as good as I could have ended up with, but we'll see how it goes up when I fit the canopy later.

Besides that concern, my method worked and all the holes still lined up when I reinstalled the bow.


I went around and updrilled everything to 1/8" EXCEPT I took the bow back out first (since it'll need smaller holes which will be tapped for #6 machine screws.

With that all done, I took everything back off the plane, deburred the holes, and put all the parts away for now. This is another area that won't fit through the basement door attached, so I'll do the final installation later once I move to the garage.
Very nice write up and photographs, thank you! Working toward the same assembly in the not-to-distant future. The write up provides a much needed workflow.
ReplyDeleteAwesome, I'm glad it helped!
ReplyDeleteYour website is really cool and this is a great inspiring article. car glass
ReplyDeleteThanks!
DeleteGood info. I’m fitting a OneX windshield. It doesn’t use a skirt. A trial fit indicates the windshield will need to be trimmed in order for the windshield lay flat on the bow and the firewall bow. I’m wondering how that is measured other than laying the windshield over the bows and the fuselage sides and then marking for the cut. The aft bow is difficult to hold in place during this process.
ReplyDeleteInteresting, this one didn't need any trimming but it was a really tight fit from what I remember
Delete